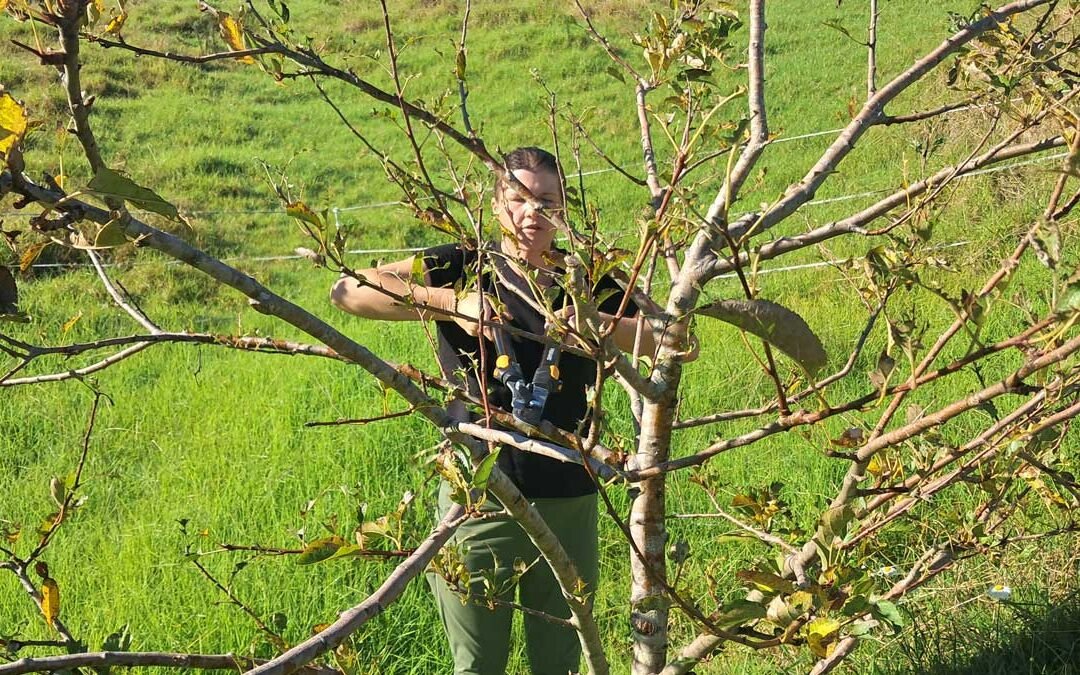
When I began researching this post (three years ago, it's being re-published freely today), I began from a pretty novice place. We had a small orchard of fruit trees, but I didn't have the foggiest idea of how to look after them.
So I withdrew a pile of books from the library (and read them!), meditated on our trees, visited a local community garden, and I learned a lot.
I’d made so many mistakes! But with three seasons of progress and knowing the things I learned writing this post, I'm happy to report we've managed to correct many of them.
This topic is huge. Several entire books have been written on this subject.
So this post will focus on key ideas and techniques you need to think about when you’re starting out with your stone and pip fruit. The things I wish I’d known when we moved here.
I’ve added external video resources throughout. If I found them useful, and if they could show you what you need to know better than I can explain it, then I've included them.
Hopefully, they’ll add context to the subjects covered here to take you even deeper into this topic.
Why prune fruit trees?
A properly-pruned fruit tree will set you up for success. You’ll have strong, healthy trees that live longer and produce more fruit.
Pruning can be hard! I know the fear of making the wrong cut at the wrong time. It can help to remember why you’re doing this.
You should prune your fruit tree to:
- create a strong tree that can withstand winds and hold an abundant crop.
- keep your tree compact and easy to manage and harvest.
- allow light to reach the branches—improving productivity.
- enable air flow to reduce disease.
- allow access for pollinators.
- remove diseased or dead growth and stimulate new growth.
Best-practice means getting it right from the start. If you keep on top of it from your tree’s younger years, you’ll get results faster.
If you have an older tree with problems, it may take a few seasons to fix them—and you may suffer losses to your harvests in the short term.
Which fruit trees need pruning?
Most fruit trees (and vines) need some kind of pruning. But this is a good chance to give you some definitions of the fruit we’ll be talking about.
Throughout this post, I’ll generally refer to different types of fruit by their ‘group name’, rather than individual species.
For example, when I talk about ‘stone fruit’, I’ll be referring to all plums, peaches, cherries, nectarines, apricots, and almonds.
Pip fruit apples, pears, quince, loquat and nashi.
Stone fruit nectarines, peaches, plums, almonds, apricots, sweet and sour cherries.
When to prune your fruit trees
Always prune on a dry day.
Wait for the morning dew to have evaporated.
When rain or moisture is present on your tree, it may increase the chances of fungal infection on your fresh cuts.
Pip fruit should be pruned in winter.
Stone fruit should be pruned in summer following harvest, or in spring.
Pruning equipment
Good equipment is essential.
Before you do any pruning, make sure you have the right equipment, and that it’s clean and sharp.
Pruners
There are two types of pruners: anvil and bypass. After that, it’s about how much of a handle they have.
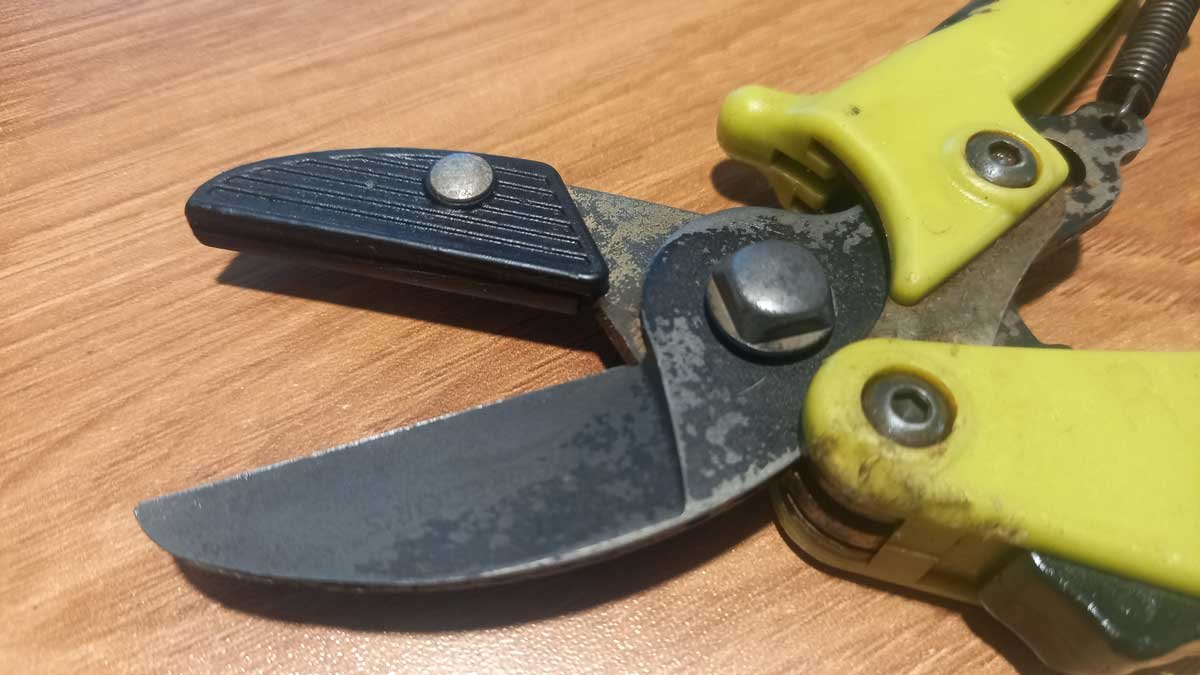
Anvil pruners have a blade sharp on both sides, and a blunted surface for it to cut against.
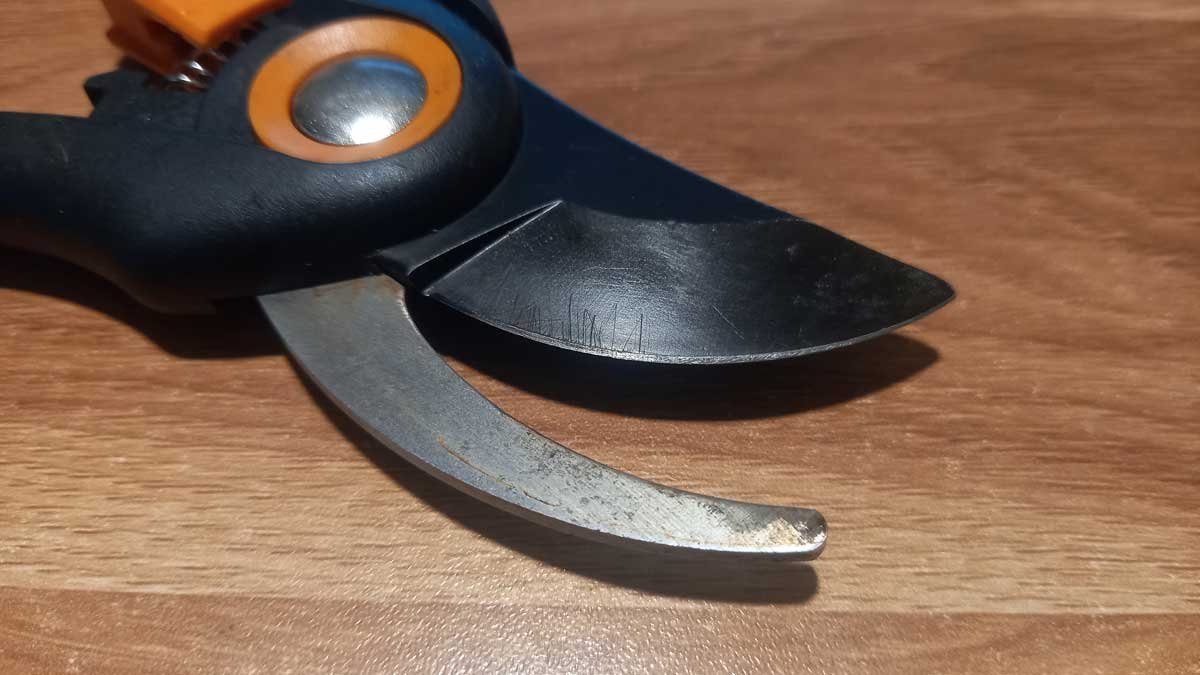
Bypass pruners have a blade sharp on one side, which cuts past a blunted surface.
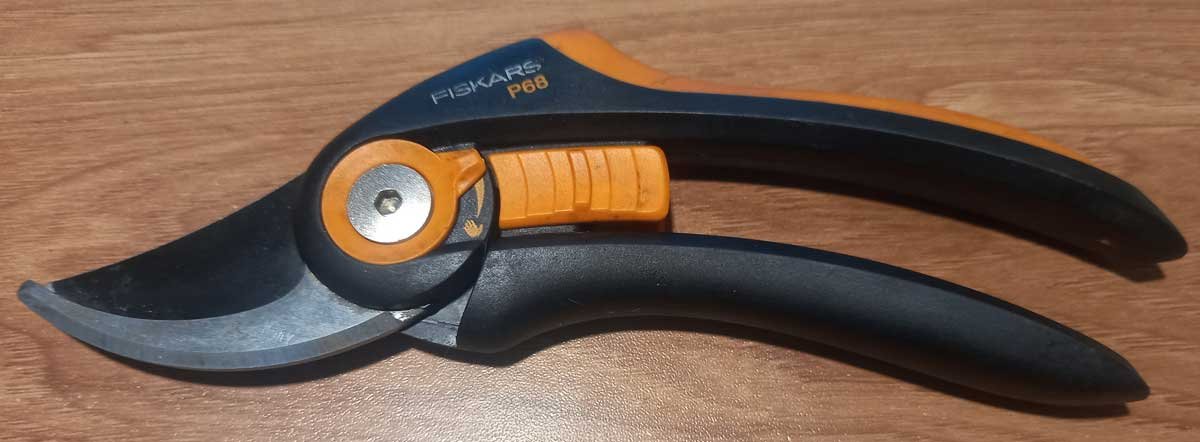
Bypass pruners. This model has a function to adjust for small or large hands.
You will probably want to have both secateurs (shorter hand-held handles) and loppers (longer handles for both hands).
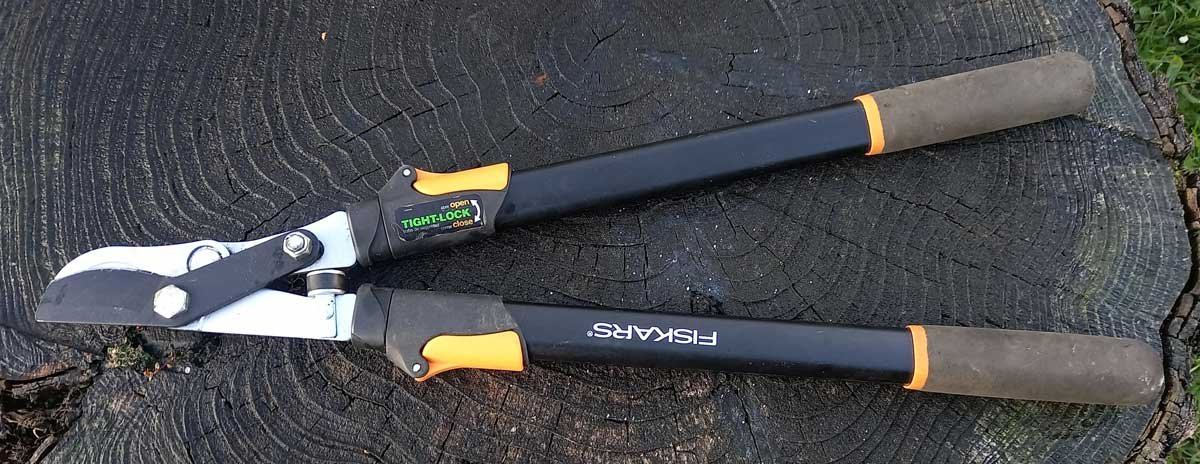
A pair of Fiskars bypass loppers. This model includes extendable handles, allowing you to reach much higher points from the ground.
Generally bypass secateurs and loppers are most highly recommended for a clean cut.
Saws
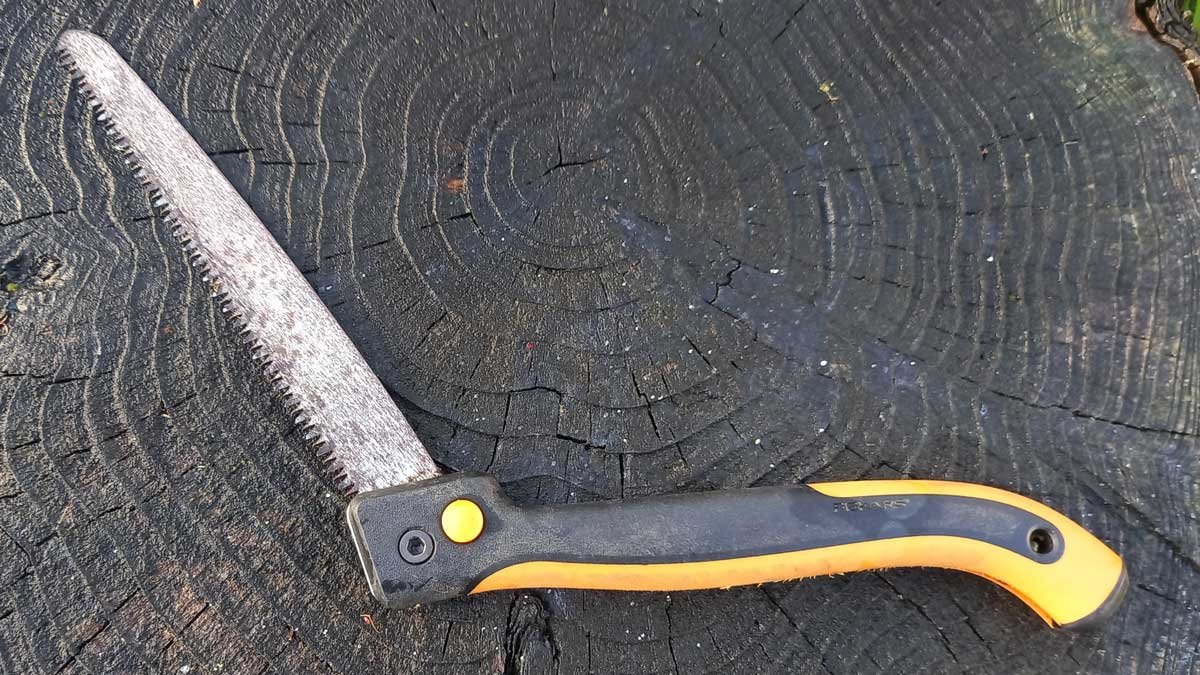
Whether it folds away nicely or not, a hand or bow saw will be helpful for larger branches.
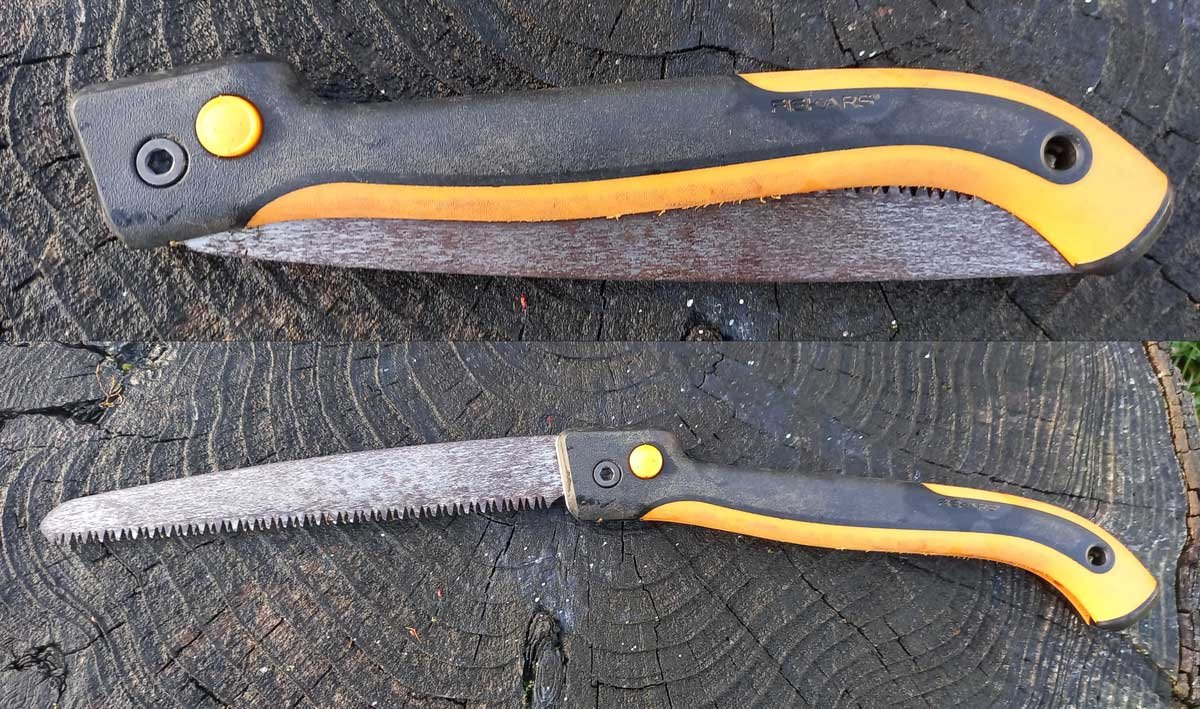
This folding saw has a third setting which is useful for undercutting large branches using the 3 cut method, which I’ll talk about later in this post.
A pole-saw will allow you to reach very high branches.
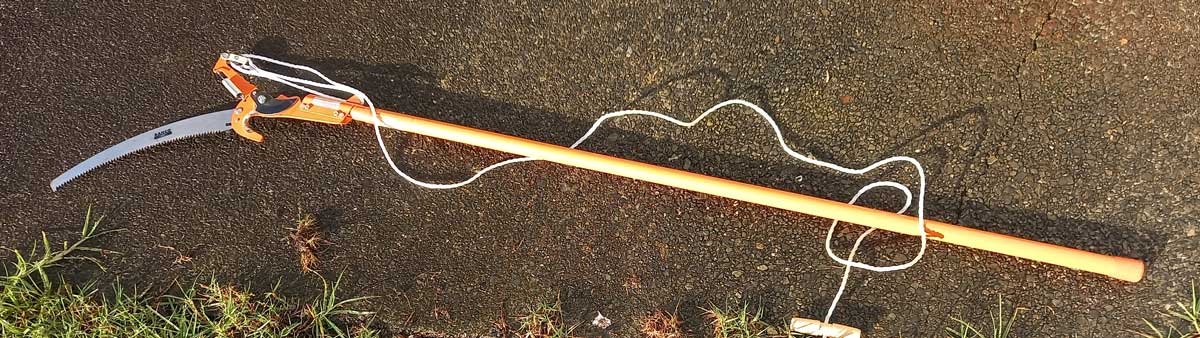
This model has an extendable handle, and a bypass pruner which is operated by pulling the string.
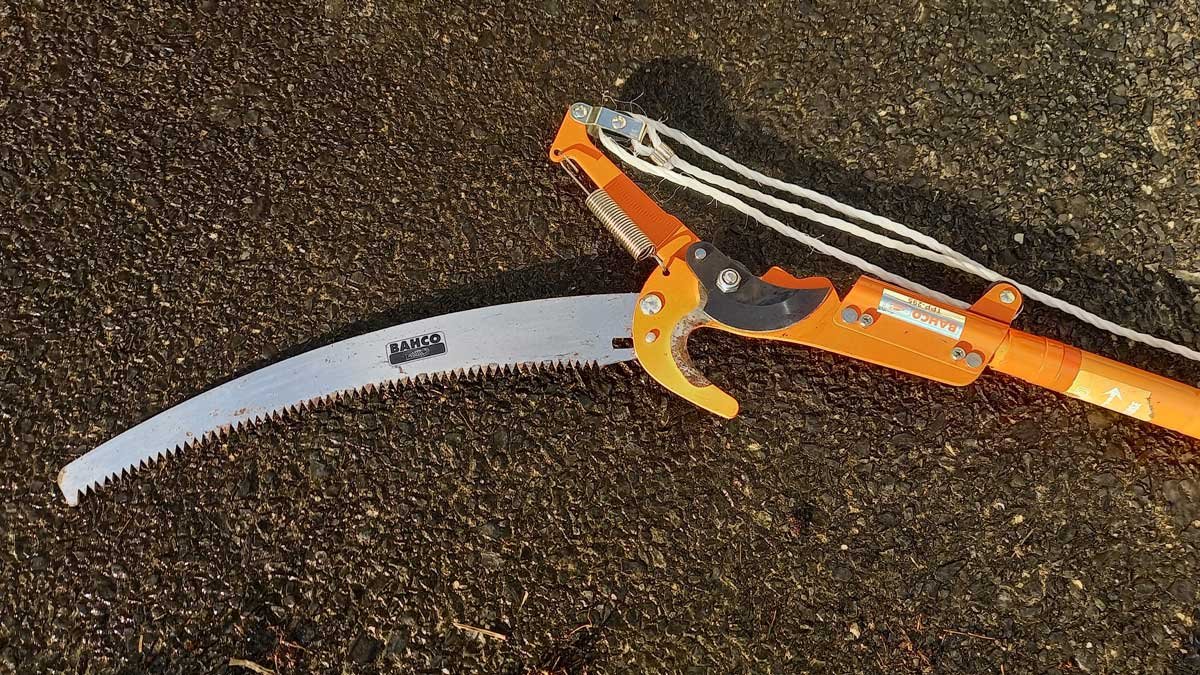
Try to buy models with replaceable blades as they’re not easy to sharpen yourself and will need replacing occasionally to remain sharp.
Power tools
One place we have "levelled up" in the last three years is by getting a battery-powered 'mini-saw'; and later a full-sized battery-operated chainsaw.
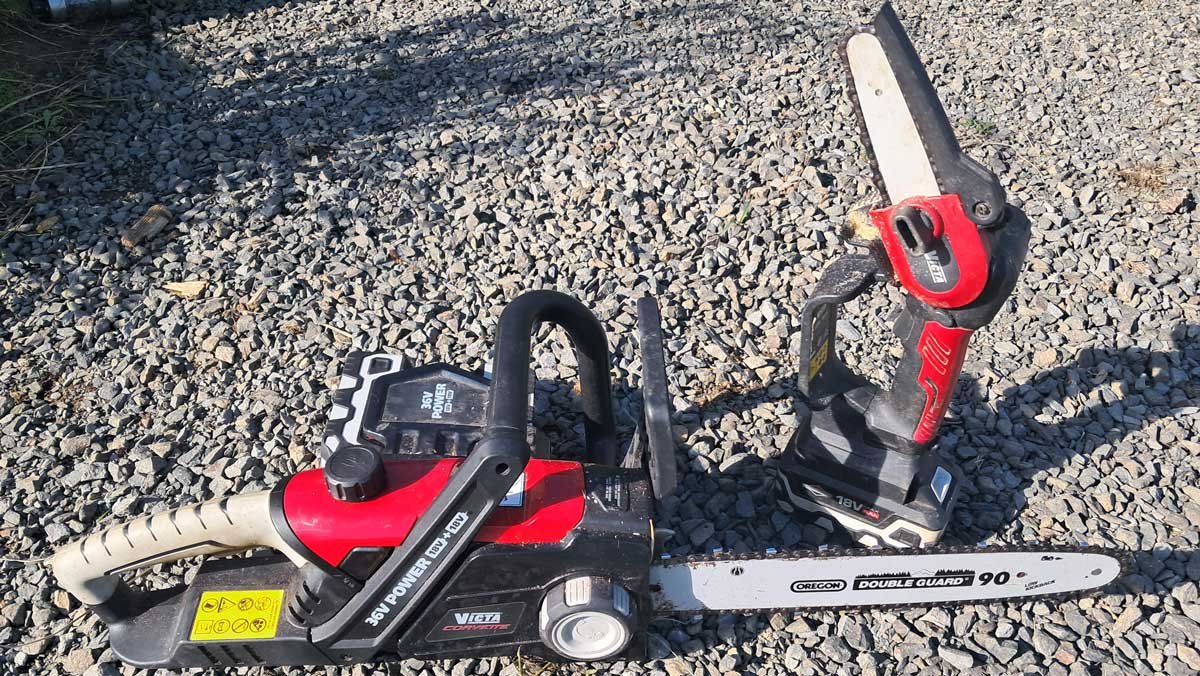
There's not a lot of call for the big one while pruning fruit trees, but the mini one has been revolutionary in almost every aspect of pruning.
Highly recommended if your trees are getting a bit big (or your arms are getting a bit old) for hand saws.
Sharpening stone
Your pruning equipment should be sharpened before you begin pruning. It may need touching up between trees.
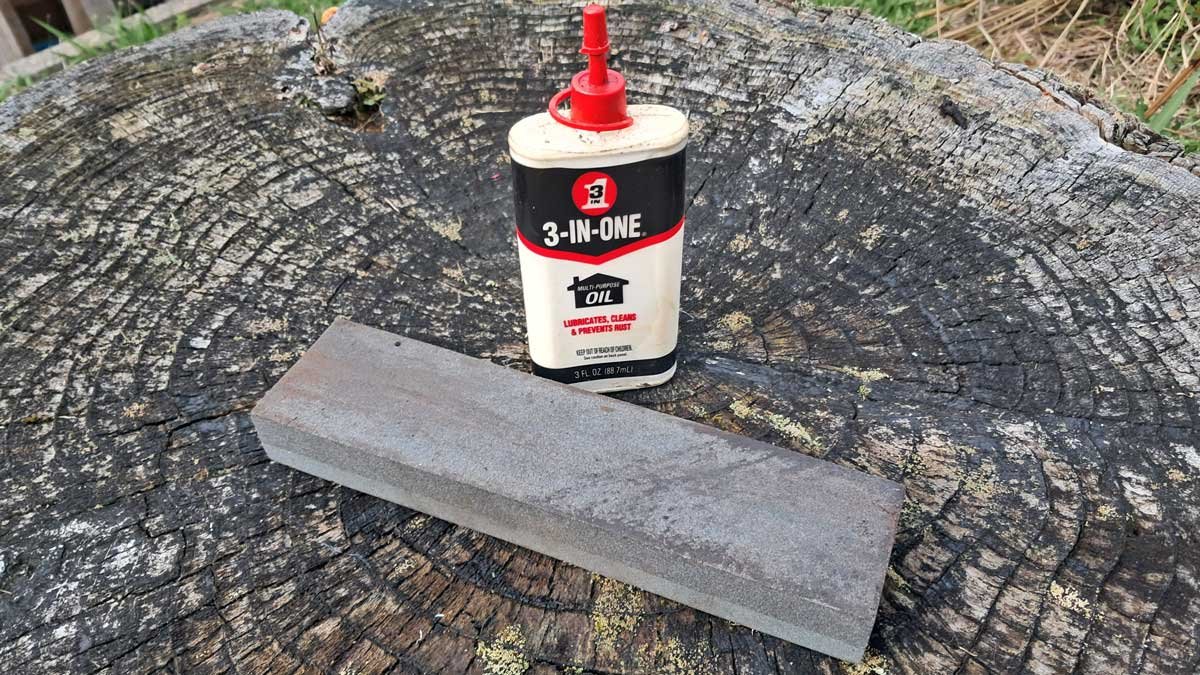
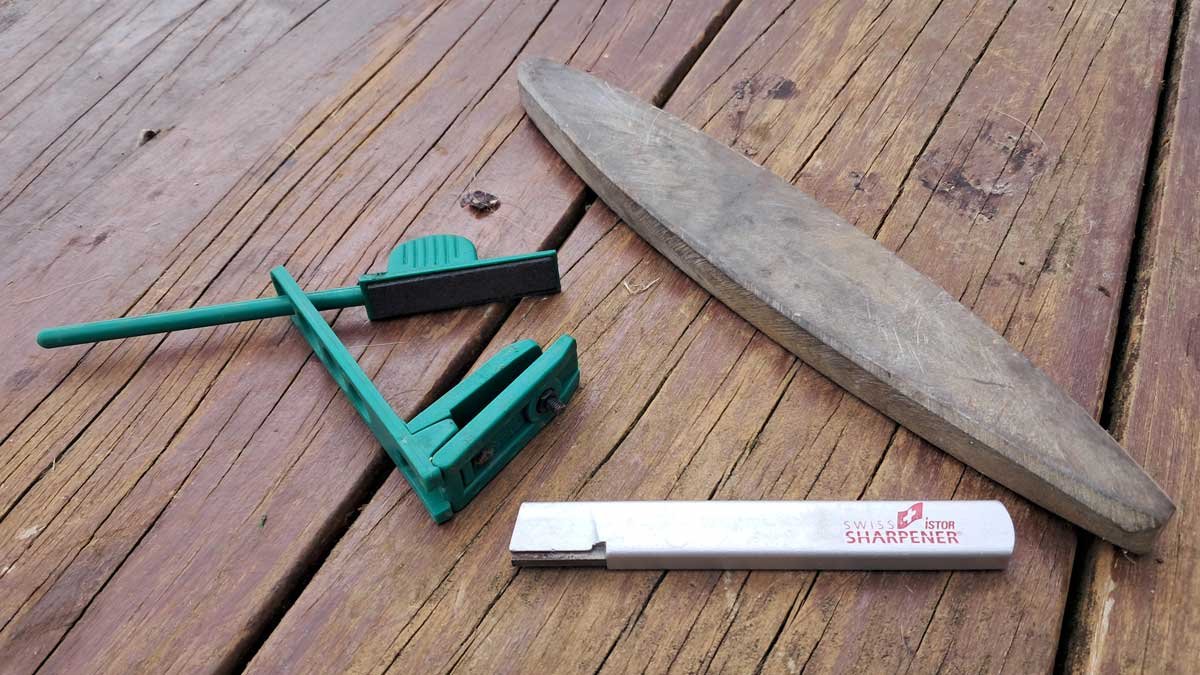
These photos show a range of sharpening tools.
On the left (or top, if you're reading on mobile) is a double-sided oil stone. You need to use a mineral lubricant, such as the 3-in-1 shown here to ensure a clean sharpen.
One side of the stone is rougher than the other, finer side. The coarse side is for rougher work, while the finer side is for finishing.
On the right (or below) is a set of water stones. All of these require water to lubricate the blade.
Sanitation
Pruning trees can be a source of disease spread. It’s important to sanitise your tools between trees.
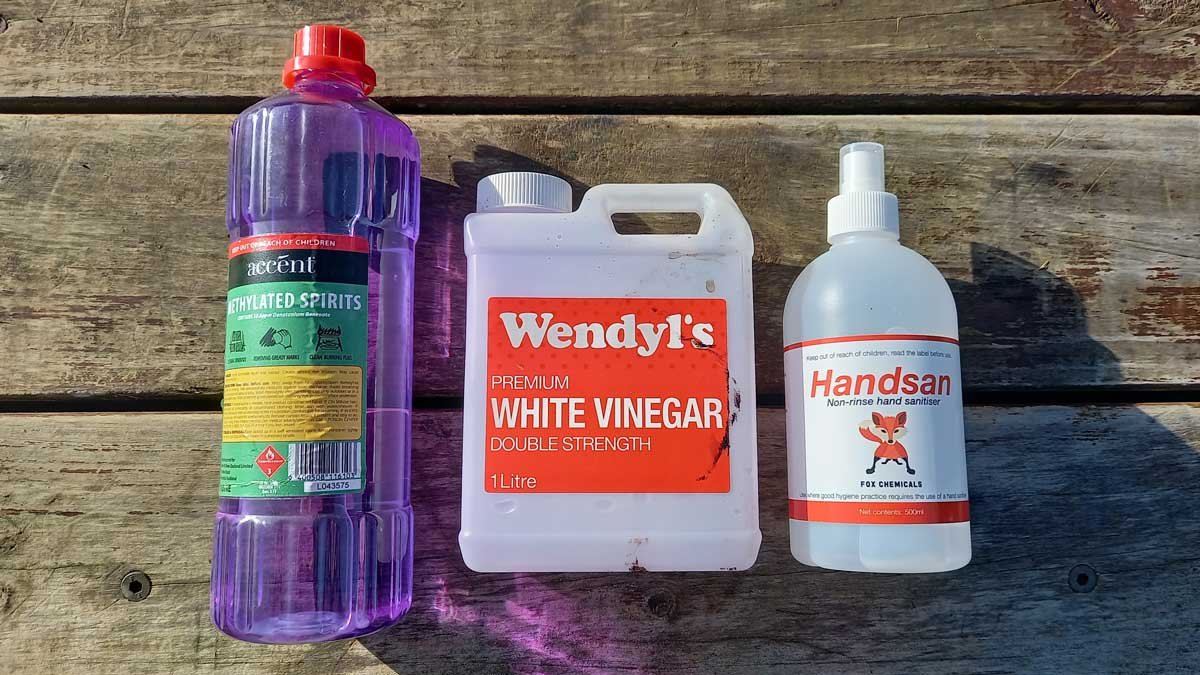
You can use methylated spirits, 70% or higher alcohol, or strong white vinegar. Don’t use bleach as it can cause wear on your tools.
Use a rag, dip into a container, or spray onto all your cutting tools between each tree.
Sealant
A sealant paste helps your tree heal after pruning. It also protects it from fungal spores and bacteria which can take advantage of the open wound to cause disease.
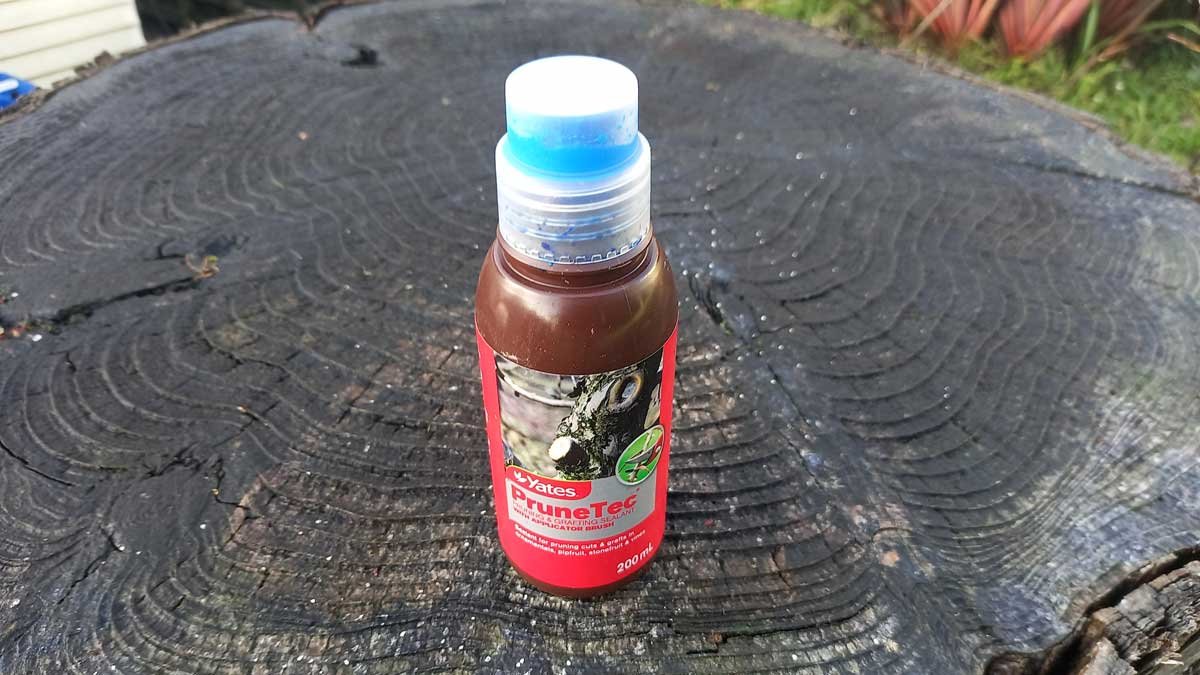
You can purchase a commercial sealant, or make your own.
I have a recipe that's made from olive oil, beeswax, and essential oils.
Understanding your fruit tree
Most plants grow and fruit in a predictable manner. Knowing how your tree grows—and the names for the parts of the tree—is part of feeling confident when you make your cuts.
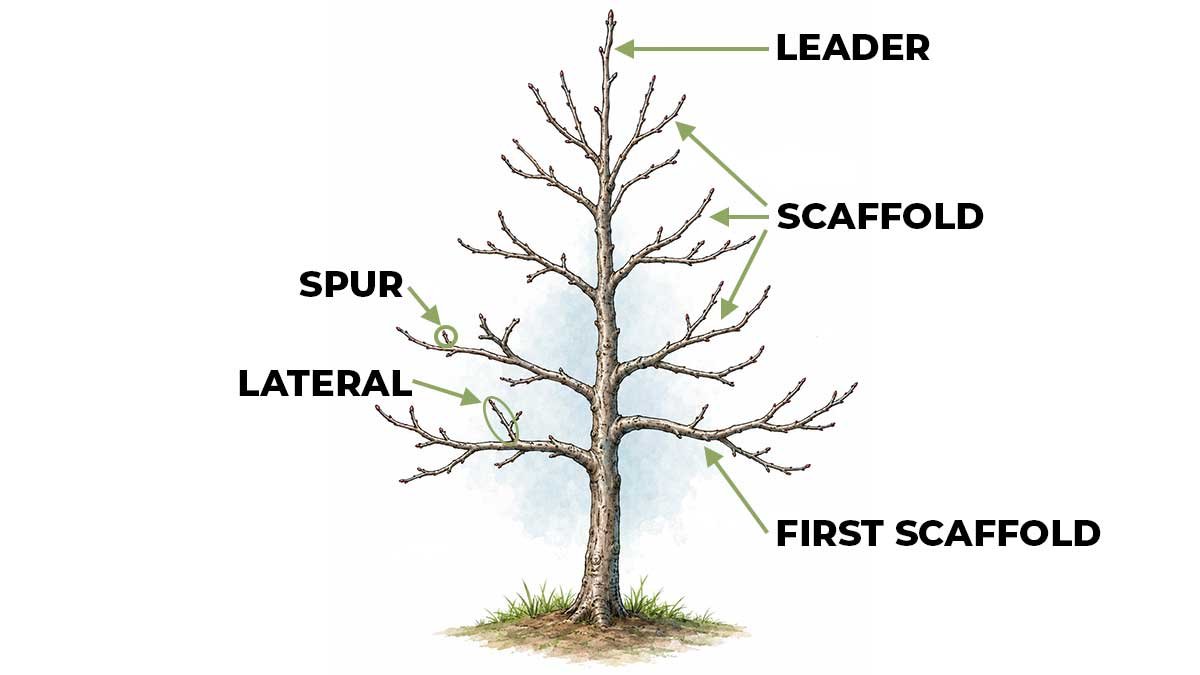
From the center of the tree and working outwards: the central leader (or trunk), supports the scaffolds.
The scaffolds grow laterals—it is the laterals that will bear flowers, and then fruit on structures called spurs.
Crotches
In a well-maintained tree, the laterals extend from the central leader at a wide angle of 30-45°, as shown in green below.
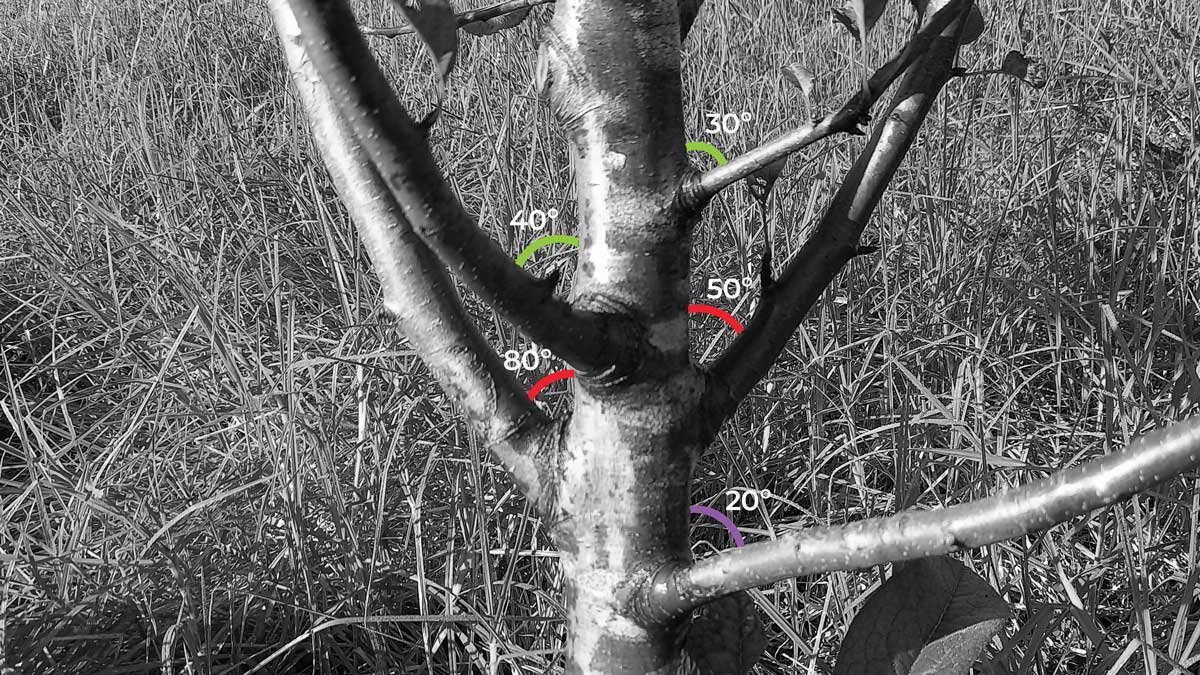
When the scaffold grows at a narrower angle to the central leader, this is called a narrow crotch (shown in red above). It is more likely to break under the weight of fruit for two reasons:
- The fruit is more likely to develop at the tips of the scaffold, causing them to be unevenly loaded.
- The branch is less stable in the first place and more prone to breaking.
Auxin
Auxin is a growth inhibitor hormone that is produced by your fruit tree. It’s produced by the young leaves at the tips of a branch and flows with gravity to the base.
It controls where you get growth and fruit. You can get better growth and a better crop by understanding and controlling your plant’s auxin.
When auxin sits at the base of the branch, you’ll find less fruiting and flowering in the lower spurs off your leaders. All your fruit will develop at the tips.
Training your scaffolds to an angle of 30-45° from the leader prevents this and spreads the auxin more evenly along the lower side branch.
This allows for more even fruit development along the entire length on the side that faces the sky.
Collars
When you go to thin your tree’s laterals, you’ll need to recognise the branch’s collar.
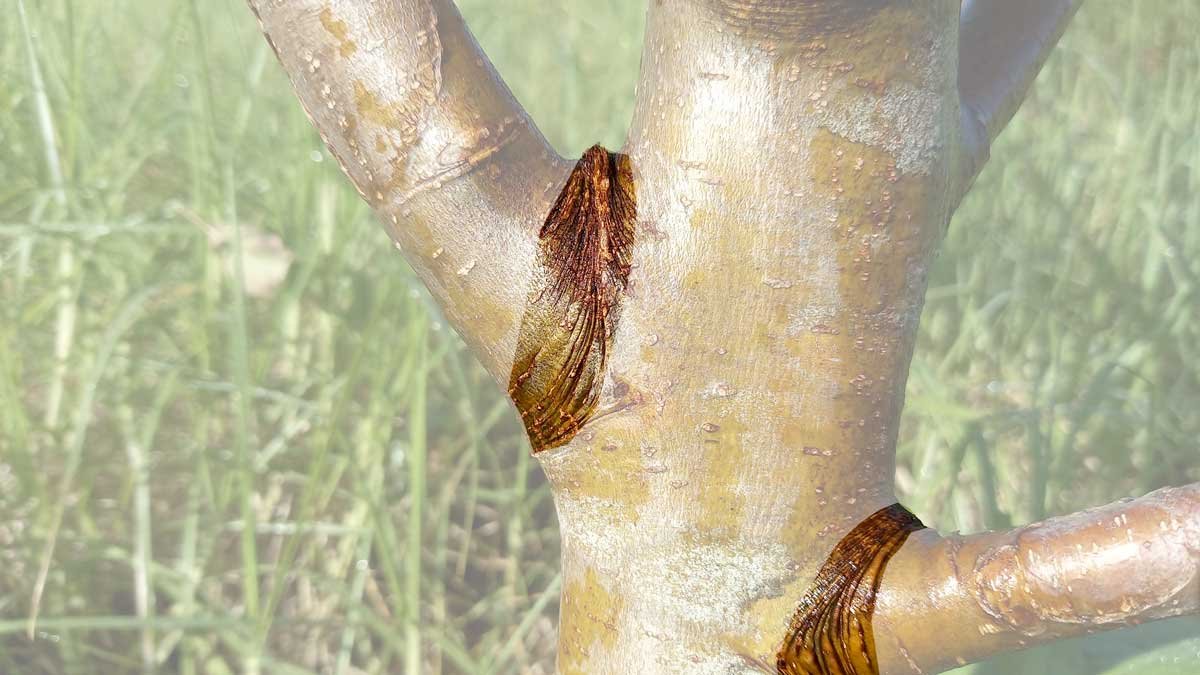
This is the slightly raised area where the lateral meets the central leader (or the scaffold meets the lateral).
A good prune is made just above the collar, leaving a little room for healing.
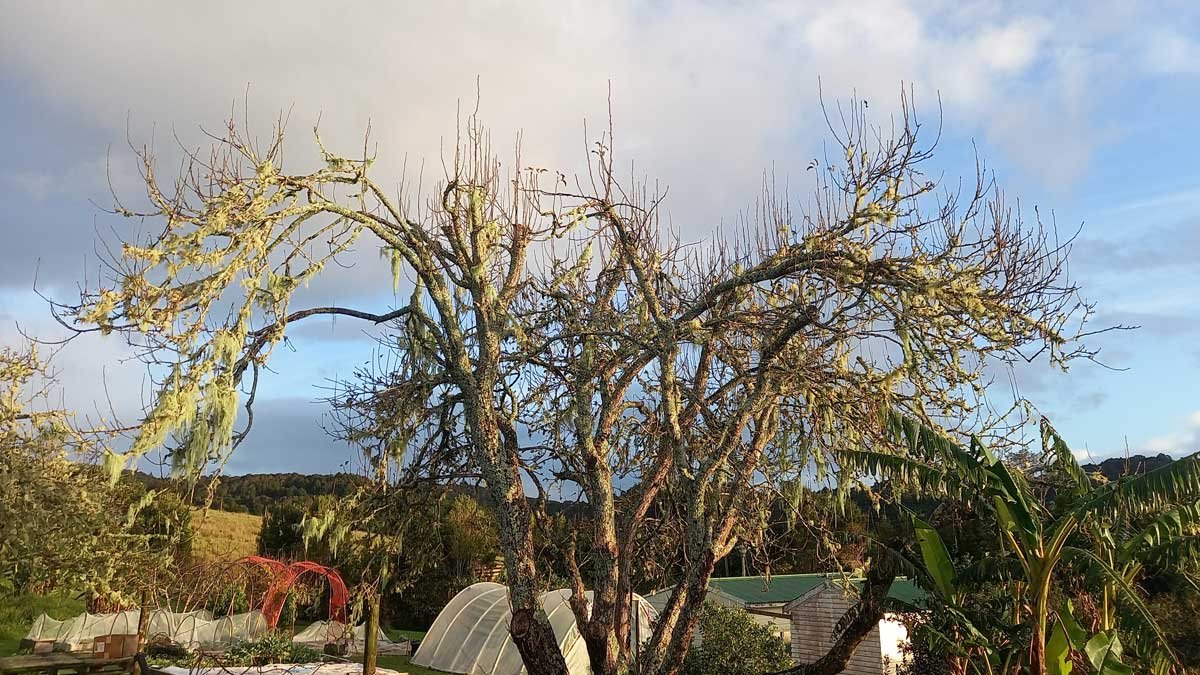
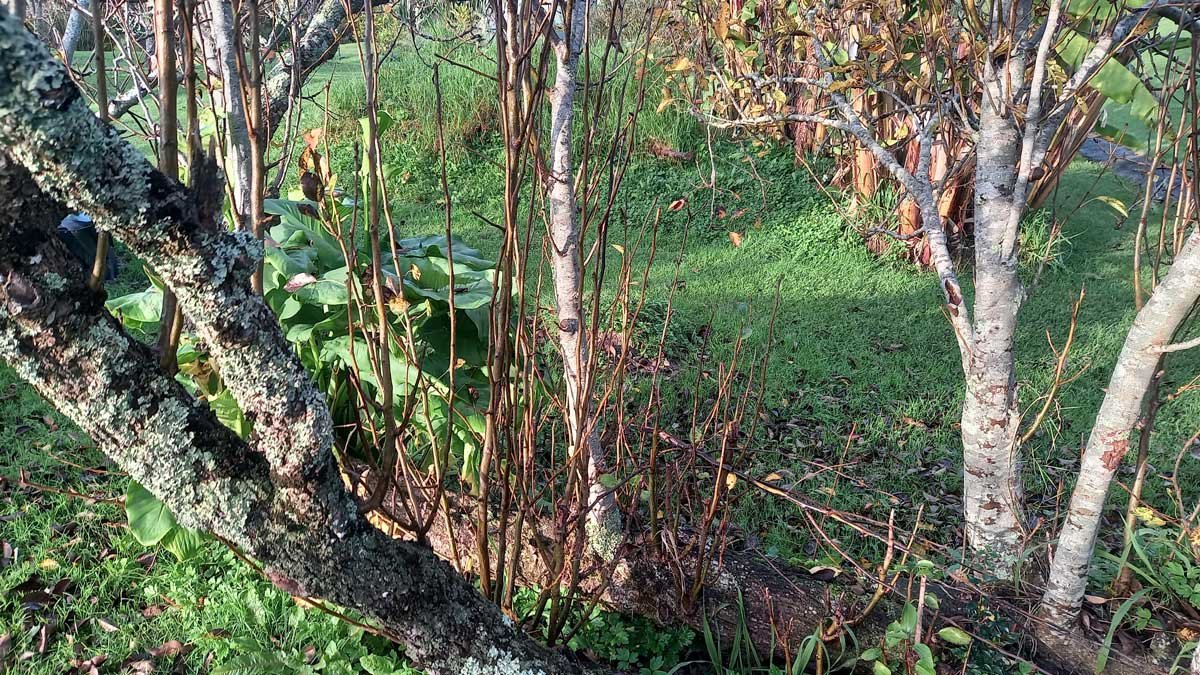
Removing watershoots should be done slowly over a few years, especially if you have a lot of them.
- In the first year, remove every third watershoot. On the remaining branches, prune off one third of the length from the tip. This is called a heading cut.
- In the second year, you should be able to remove up to half of the remaining watershoots, and a heading cut on the ones that remain.
- By the third year, you should be able to remove the remaining watershoots, directing all your tree’s energy into useful growth.
Tree shapes
There are two main ‘shapes’ you can prune your tree into—a ‘central leader’ or a ‘vase’.
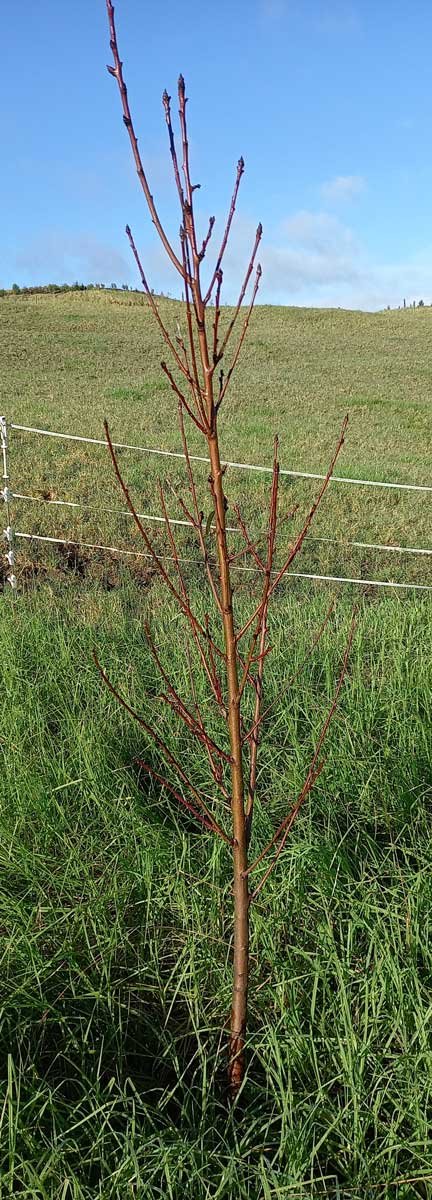
Central leader
A central leader shape has one leader (truck) running up the centre(ish) of the tree.
Scaffolds branch from the trunk, with laterals and spurs connected to the scaffolds.
Pip fruit are usually central leader shapes.
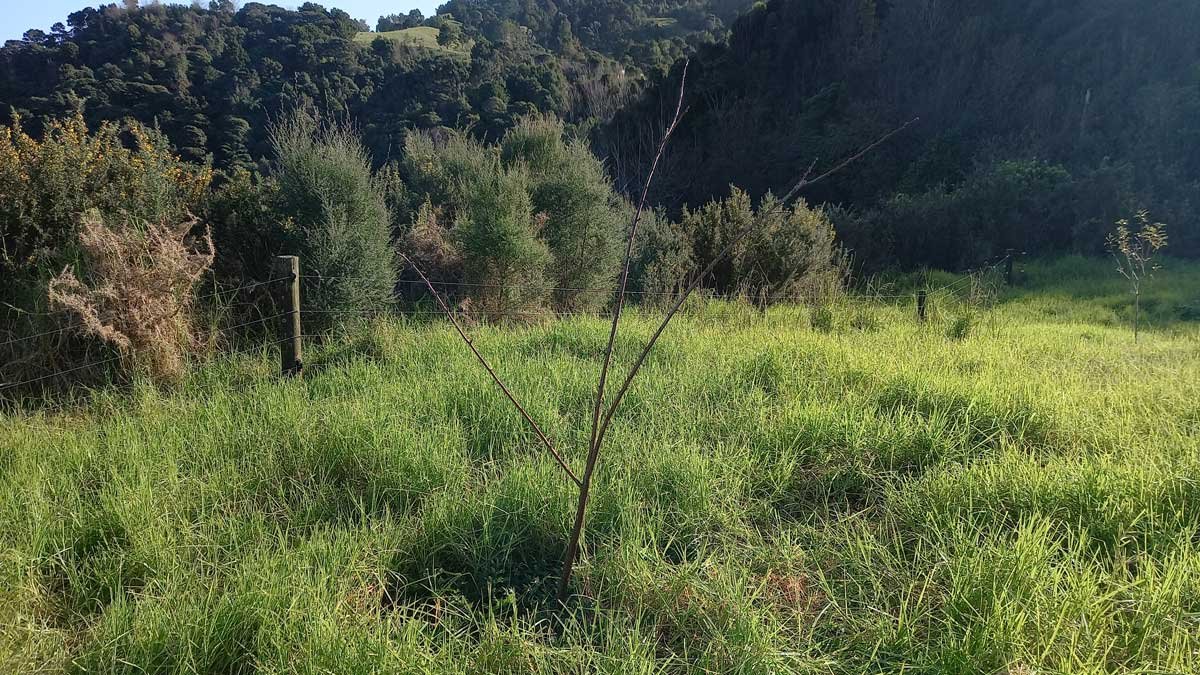
The tree to the left is a nectarine that seems really intent on being a central leader and I think I will let it.
Here, you can see a central stem running through the middle—the leader.
Off the central stem are way too many scaffold branches. I will need to focus on removing a lot of them this spring and next summer.
This tree is entering its second year, so there are very few laterals and spurs.
Vase shape
A vase shaped tree has 3-7 scaffold branches extending from a central trunk at about waist-height.
Each scaffold then has laterals and spurs growing from there.
How to prune your fruit tree
When you are pruning, you’ll make either a thinning cut, or a heading cut.
Each of these cuts will produce a different response in your tree.
A thinning cut reduces the number of scaffold or lateral branches by removing them at the collar. You’re completely removing the branch at the point it meets the next branch.
This opens the tree up for more light and/or air, and directs growth into more useful branches. Most of your cuts—especially as the tree gets older—will be thinning cuts.
A heading cut is made at the tip of the leader, scaffold, or lateral to stop growth at the bud. You’re cutting at one end of the branch, leaving at least some of the branch behind.
When you make a heading cut, the tree will respond by growing two (sometimes more) branches at the place you have cut.
The Golden Rules
Never take more than 30% of the tree in one season.
Always sanitise your equipment between trees.
Study your tree before you cut. Mark the branches you plan to cut with string, a peg, or spray paint. Study it again.
Always prune on a dry day, after the morning dew has evaporated.
Make more thinning cuts than heading cuts.
Order of operations
First, study your tree for at least 5 minutes.
It might help to use string, chalk, ribbons, spray paint, or some other method of ‘visualising’ your plan when you’re first starting out.
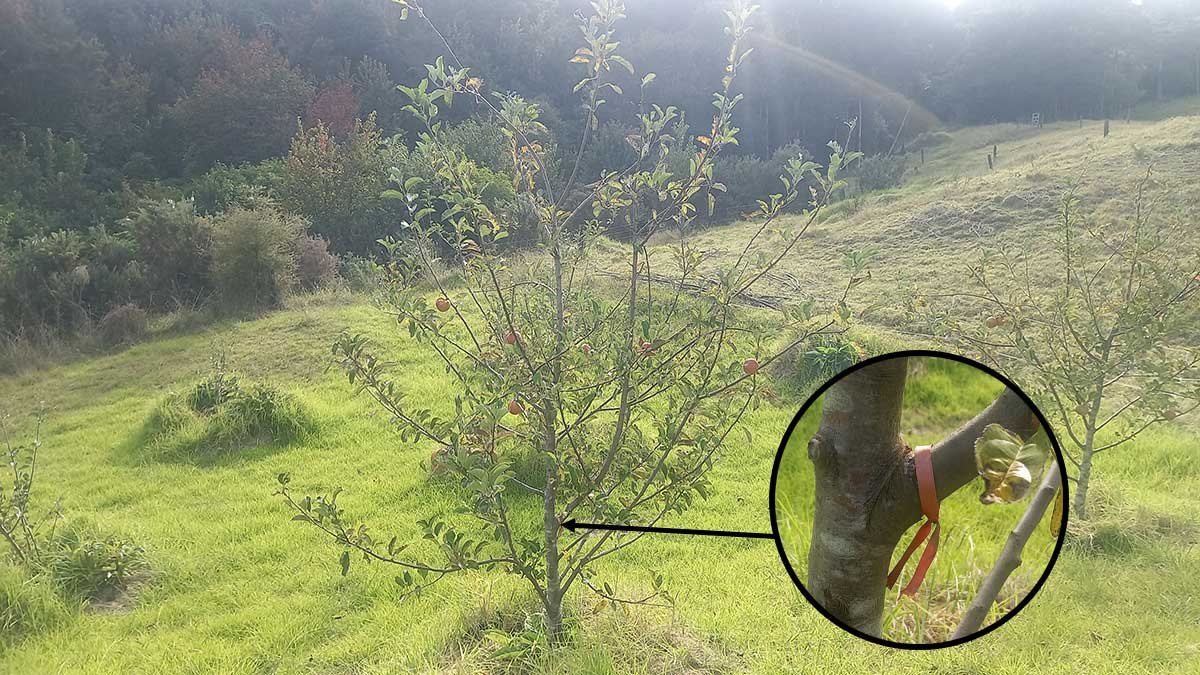
In Year 1, I pruned this tree but left this branch so I could limit how much I took. I marked it with a ribbon to remind myself to remove it in Year 2.
Remove dead, diseased, or damaged branches first.
Then starting, from your thickest branches, work your way down to the smallest ones, remembering that you’re aiming to:
- let light in
- prevent branches growing into each other
- ensure the scaffolds are strong and even.
Removing branches
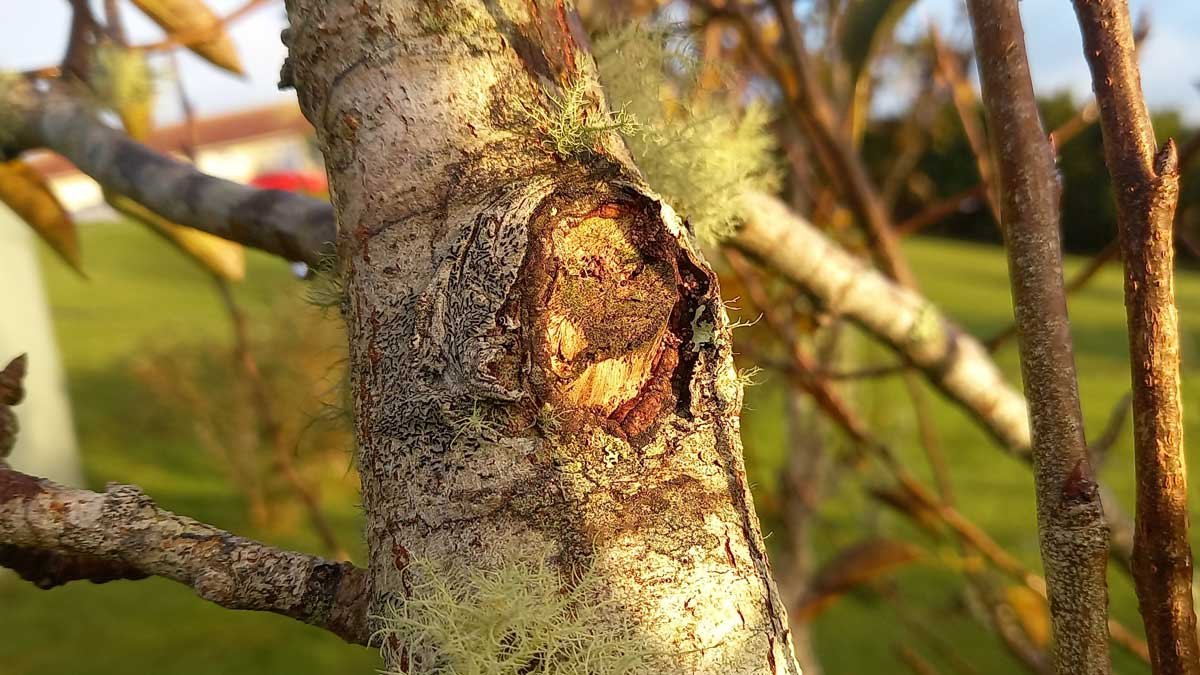
When removing branches, you want to cut just above the collar. Not too far away or too close.
Getting this wrong makes it difficult for the plant to heal. It can become an entry point for pathogens, become a weak point, or lead to weird growth.
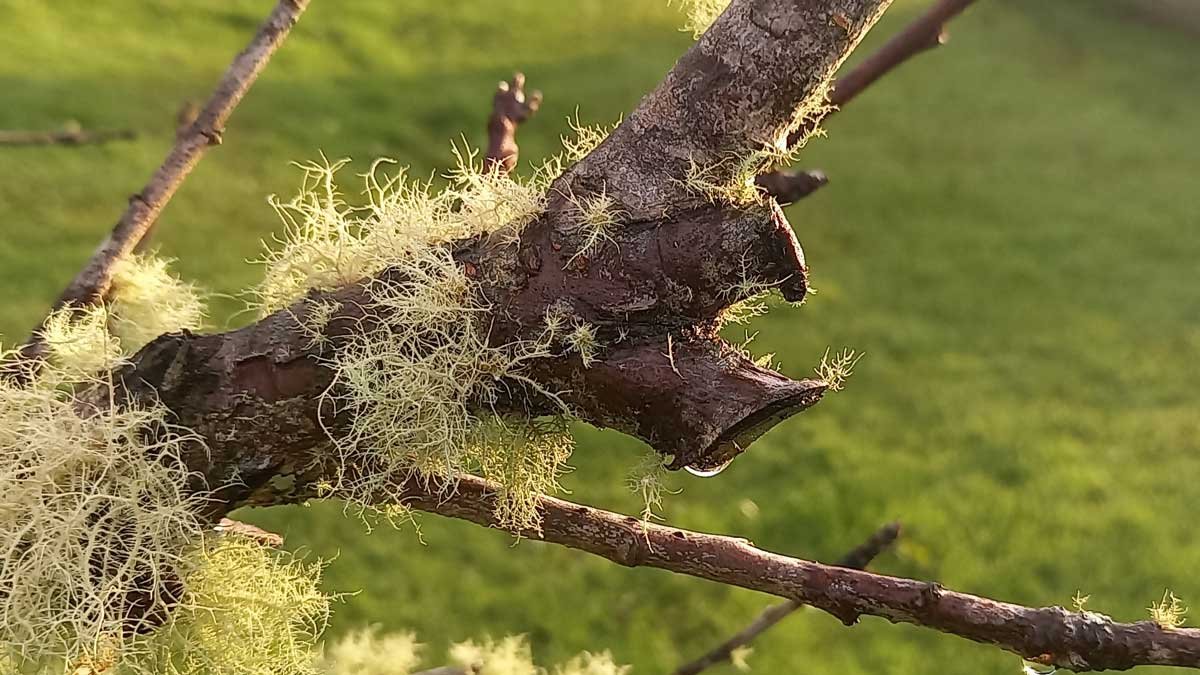
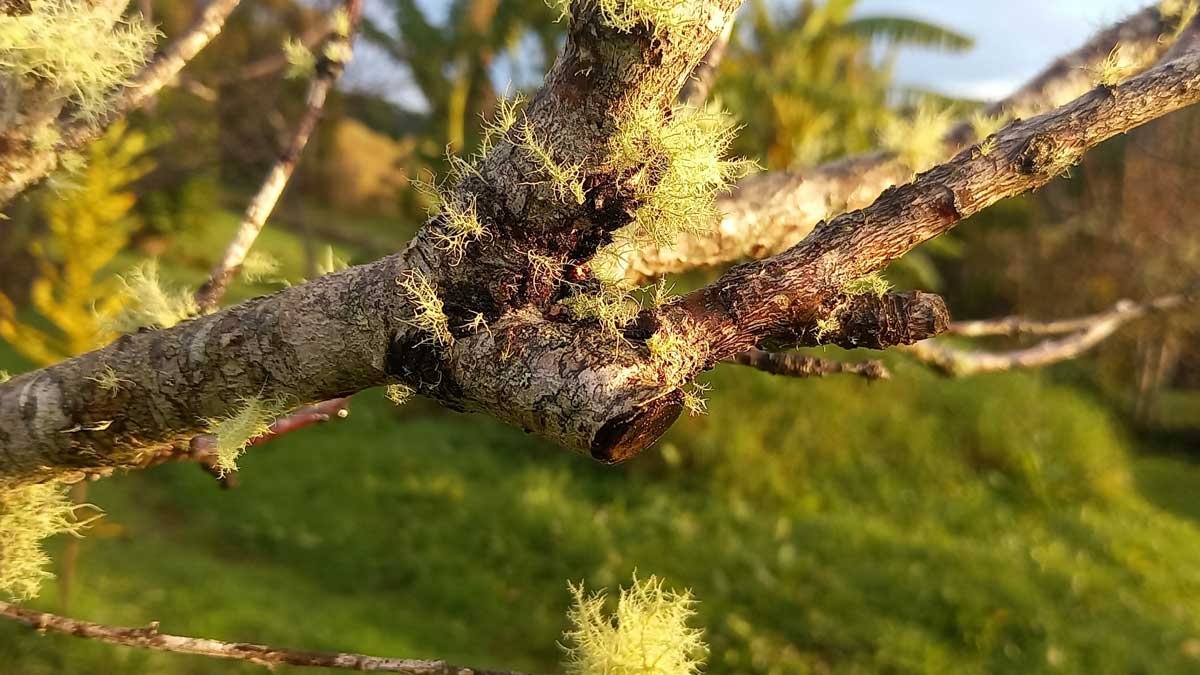
Above: Too far away from the collar resulting in weird growth.
Below: Pruning too close to the collar offers a point of weakness for later infections.
Heading back and buds
Pip and stone fruit have two types of buds—stem and leaf, and flowering and fruiting.
A flowering and fruiting bud will, well, flower and then (if pollinated), become fruit. It is the fatter, rounder one.
A stem and leaf bud can become either a leaf, or a new branch. Sometimes both. They are thinner and pointier.
When you cut to a leaf bud, it will stimulate that bud to become a branch. Whichever way the bud is facing is the direction that branch will grow.
Always prune to an outwards-facing bud. Cut on an angle to allow rain to run off. Cut about 2-3mm above the bud.
3 cut method
If you have a big, heavy branch to remove, you want to be using the 3 cut method.
This prevents your pruning seriously damaging your tree. The first two cuts are about removing the bulk of the branch, while the third cut is about getting a nice good cut.
Training fruit trees
If you find the crotches of your scaffold branches are too narrow (or too wide), then you can train them while they’re young and supple to grow into a better shape.
You can check your crotches using my downloadable "Crotch Checker" PDF.
Use it to compare the angle of your scaffold to the central leader.
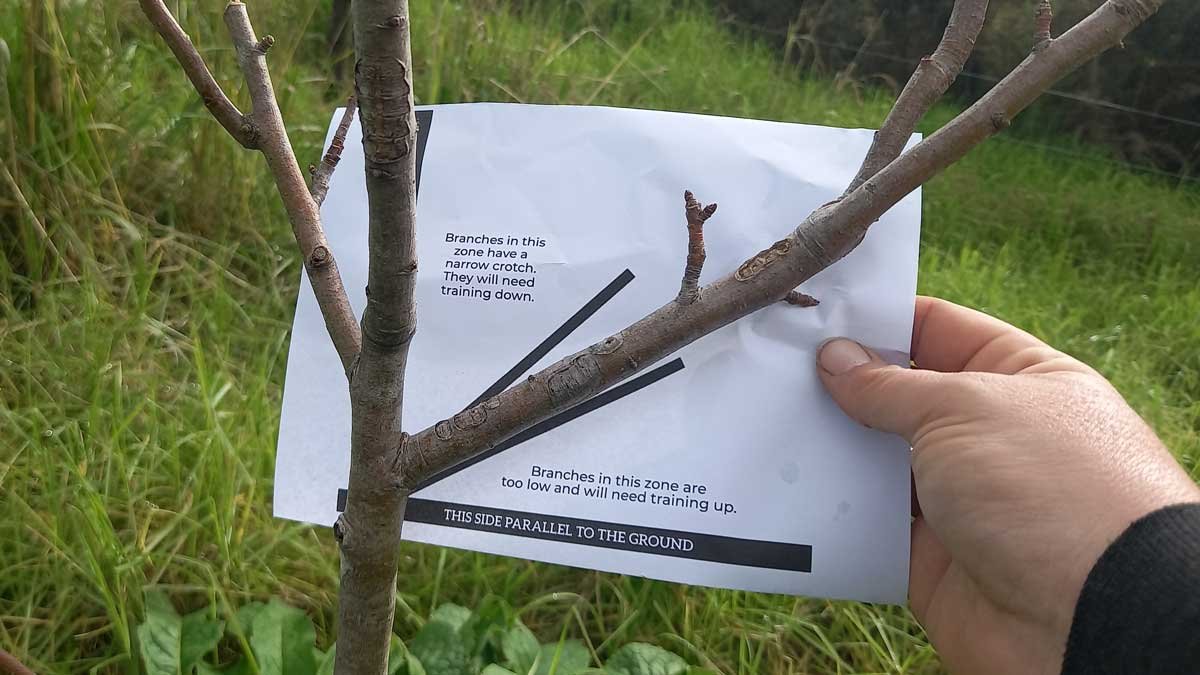
More often than not, you’ll need to train down. You have a few options:
- Tie down using a soft fabric (like ‘Jolly Ties’ or strips from an old t-shirt). Loop one end around the branch, and secure the other end to the ground.
- Fill plastic bottles with water and use soft wire ties to attach them to branches.
- Buy ‘branch spacers’ from AliExpress etc.
If you need to train up:
- Tie the branch to the central leader to lift it up.
- Use a branch with a ‘Y’ formation to push from below.
Recommended reading
There is so much more to cover, but I think I’ve given you the basics.
If you'd like to learn more, I found both of these books in my local library. One was so useful, I purchased a copy for myself to refer to every year!
Pruning Fruit Trees - A Beginner's Guide by Kath Irvine
A simple and easy-to-carry reference guide which honestly belongs on every Kiwi fruit-growers bookshelf.
I find it helpful to flick-through and refresh before Pruning Day, and have it with me for moral-support during the tough decisions.
Grow a Little Fruit Tree: Simple Pruning Techniques for Small-Space, Easy-Harvest Fruit Trees by Ann Ralph
With this guide to strategic pruning, gardeners learn to make well-timed cuts to backyard fruit trees that result in shorter, sturdier trees and keep the harvest within reach.
READ NEXT
4 things to consider before buying fruit trees
The most important things to consider before you invest in a fruit tree.
READ NEXT
Planting comfrey under fruit trees
A passive fertilising mulch that grows itself. Is there a catch?
READ NEXT
Citrus care guide
All the best tips and tricks to get the most out of your citrus plants. Lemons, limes, mandarins, oranges.
Related content: apples · cherry · deep dive · disease · fruit · fruit trees · gardening advice · how-to · loppers · nectarine · orchard · pip fruit · plums · pruning · pruning paste · secateurs · stone fruit · tools · winter · winter gardening
Stay in touch?
The Kat's Garden newsletter gives readers an extra peek behind the scenes. It's the best way to know when new posts go live, and what's happened since.
If you like what you've seen, join us and see what we learn next.