Way, way back in winter 2017, I purchased a 1-bay chicken coop from Outback Buildings. At the time it cost me $1,095, and the roof specifically came with a 10 year guarantee (though not the rest of the building).
Back in 2020 I wrote a bit of a review on what led us to make this choice, and I stand by it today.
It’s 2025 now, and I’ve had some thoughts over the last 8 years about my chicken coop. It’s not often you find a customer reviewing a product after using it for so long; but I also think if I were looking to invest (what is now) a couple of grand in a chicken coop, I’d want to know how it stands up to time.
So here are my thoughts on my Outpost Buildings chicken coop after using it for 8 years.
Built strong
The coop is very strong and heavy. I’d never worried about it being moved by the wind until I went out to feed the chooks one day and the building was… not where we’d left it.

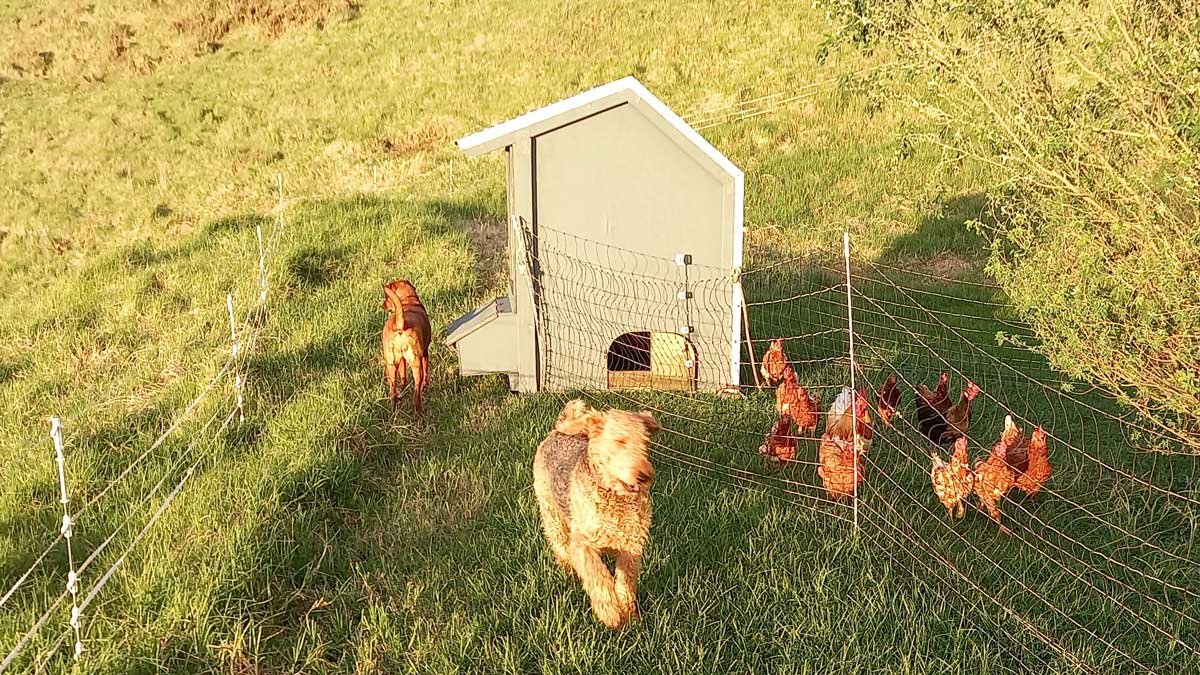
A photo of the coop taken a few weeks before the incident showing it at the top of a small rise, facing north.

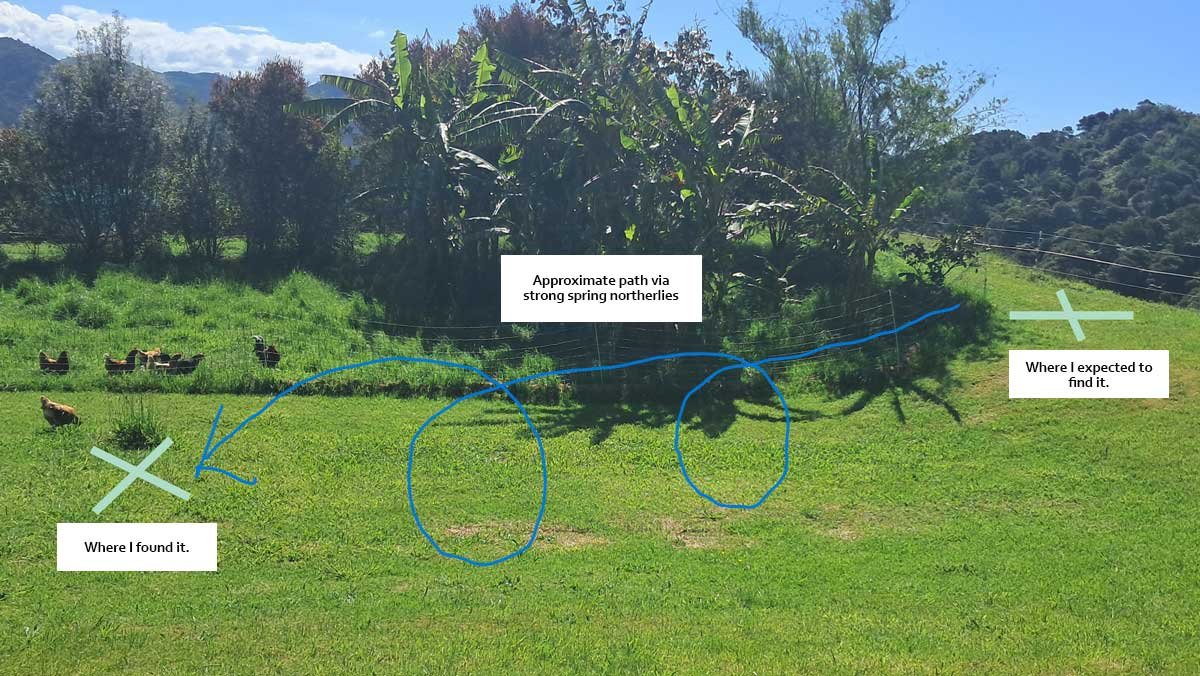
This was not where or how I expected to find the coop. It was a mess.

A strong northerly had rolled it down a small hill. As best we can tell, it rolled over itself at least twice.
So our coop has seen some things. And you know what? It totally survived. The human door was a little stickier for a while, but it’s settled back since.
It turns out, an Outpost Building chicken coop will take a literal beating.
What we’ve replaced
You want to know what’s going to go first, right? We got hit with rust before rot has become an issue.
We don’t live “by the sea”, but as the bird flies, we’re roughly 10-15km from the ocean. I’ve noticed the rust on more than just the coop.
At around the 5-6 year mark, we had to replace the lid of the nesting boxes. The hinges were the first thing to go, but the plywood on top of the nesting boxes also wasn’t doing great. Probably because we forgot to use the plastic they provided to prevent this problem to begin with. Thankfully I had saved the plastic, so it went on with the replacement.
A few hinges and a piece of plywood are not overly-expensive or difficult components to source, so this has never felt like a big deal.
We made the new cover for our nesting boxes larger and heavier than the old one to keep our dog from stealing eggs.

Replacement lid and hinges on the laying box.

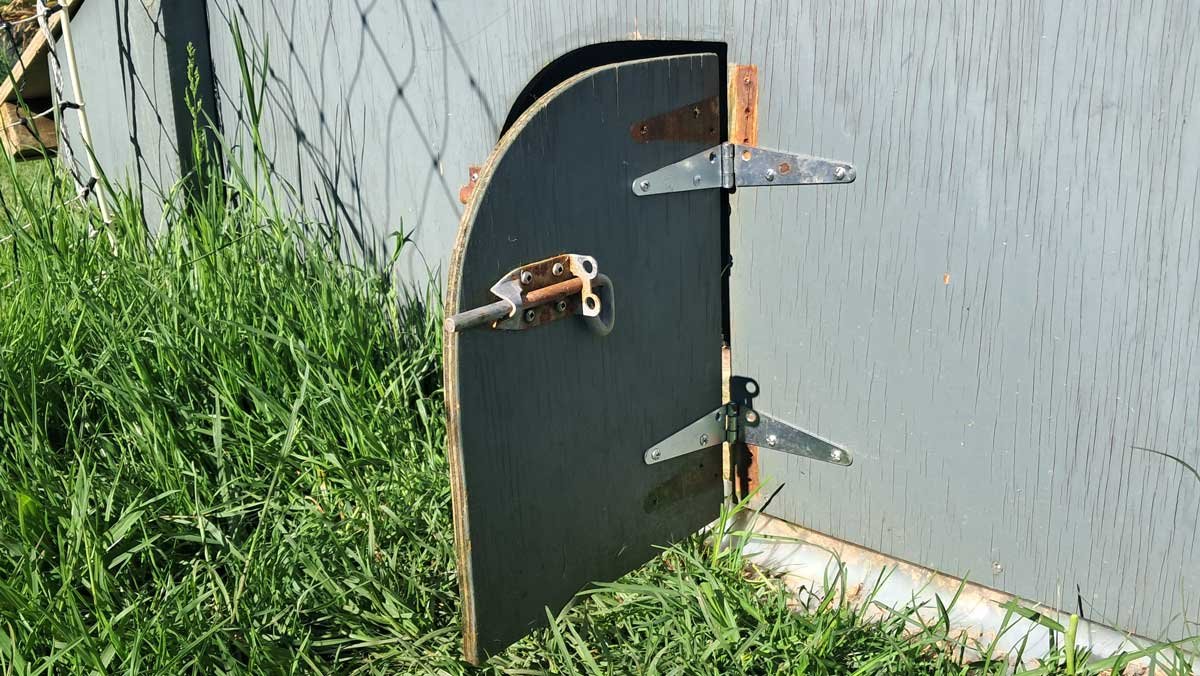
Replacement hinges on the chicken door.
As well as the nesting boxes, we’ve also had to replace the hinges on the chicken door. I’m pretty sure the screws are actually what died here, and I’m also not sure that’s Outpost Building’s fault. It looks like we might have ‘found’ some screws for that purpose. So another user-error to avoid.
Again, not a huge cost or even difficult to do, but that’s what crapped out for us.
Possibly if you are building a new one, you may want to upgrade the hinges specifically. But it’s also not a huge problem or expense to replace them over time.
Paint it!
One of the best decisions we made with our chicken coop was to paint it—which we’ve only done once when we built it 8 years ago.
I’m pretty sure it got 2 coats with an external acrylic paint + primer. It definitely was not expensive paint. It was what was available at Geoff’s Emporium for $20.
But even cheap paint has proven worthwhile. We only painted the outside, rather than both sides. Possibly if I were to do it again I’d think harder about doing both sides—at least when I build it—for even more protection.
We do waterblast it around once a year, but the paint has kept the whole building in good condition. It’s definitely due for another coat, but it’s got life in it yet.
How it’s held up
Aside from the hinges, there’s no rust on the roof, flashings, or wire window. The human-door hinges are also fine, though a bit rusty and may need replacing down the line.
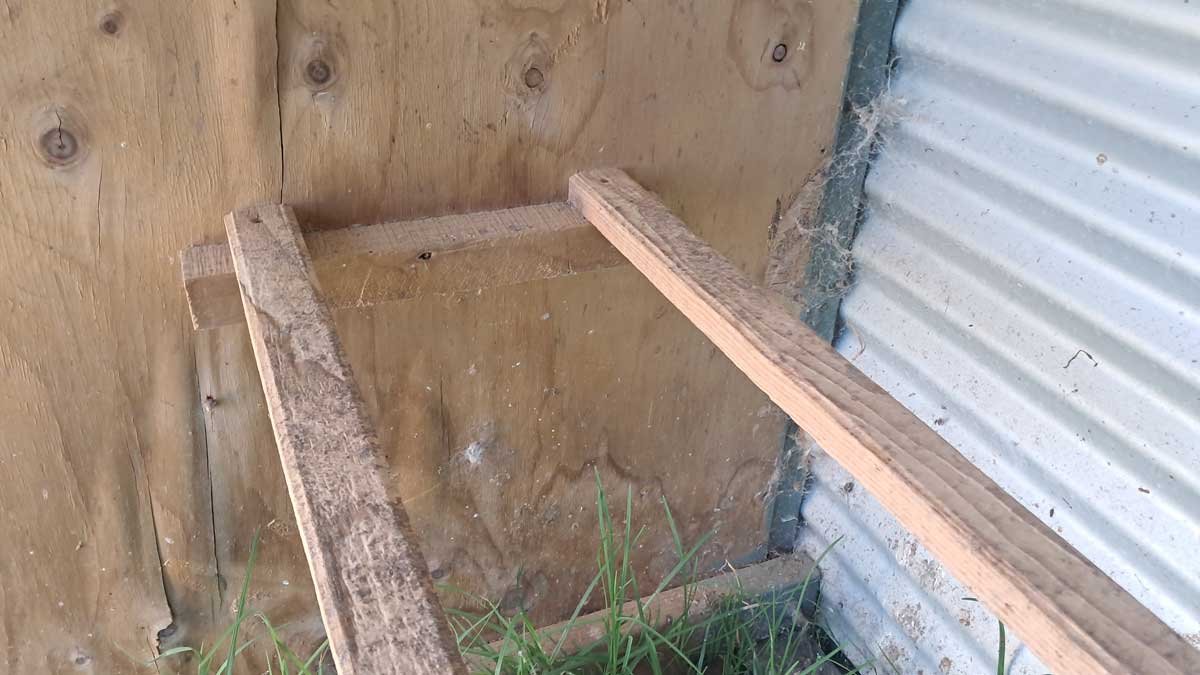
Overall the wood is still solid. We installed some hooks to hold the chicken fence, and that may be causing some issues in the plywood on one side, but only on the layer inside the house. I’ll seal that from the outside and hope that stops any progression.

The roosting bars and damage to the inner plywood.
There is some deterioration on the lower ‘windowsill’, but that looks like a fairly minor job to replace if it becomes an issue.
Importantly, the skids it’s built on top of are still in good condition. We haven’t had a need to replace the roosting bars, but again this wouldn’t be too hard to do if we needed to.
The nesting box does get a bit wet and can be subject to chicken poo degradation. Airing it out every few months is important.
But frankly, the whole nesting box could rot out and it would be fairly straight-forward and cost-effective to replace ourselves with a sheet of plywood and a few screws. This is probably the piece most exposed to the kind of conditions that cause deterioration. But it’s also designed to be easily-replaceable.
Our model also did not have a floor so I can’t comment on that.
Overall
Look, if you have DIY and/or building skills, it’s probably going to work out cheaper to design and build a chicken coop yourself. Particularly if you already have, or can cheaply find the materials.
The current price for the same thing is $2,299—over double what I spent—and you can go a long way with that kind of budget with the right skills.
You’re going to need a certain level of skill to build it either way, or you’ll need to be prepared to climb a bit of a learning curve. It was more complicated to assemble than most flat-packs I’ve ever built. It really did feel like I was building, rather than assembling.
However on reflection, I’ve used the skills I gained with the chicken coop to build other small structures and garden beds in the years since. That was a surprise. It felt frustrating at the time, but it turns out I got a bonus learning-experience with this purchase.
And the design element was taken care of. Quality-wise, Outback Buildings have undoubtedly made a workable and durable design, and supplied materials that will (mostly) hold up over time.
This is especially valuable if you’re new to chickens and perhaps don’t understand what they need yet. That’s part of what led me to purchasing it, and I have no regrets. Of the options available to me at the time, I think I made the best choice.
The coop is built to last, and will see you right for years to come. I feel confident at this point that as long as it doesn’t go flying off another hill, and that we do some minor maintenance like replacing small parts, the occasional waterblast, and another coat of paint; this coop is probably going to last at least another 8 years.


I started out building garden beds- I’d pick up heat treated palettes for free and turn them into raise beds. First one was rough, but nowadays they’re quick and decent looking (I line them with weed mat) and they’re about 3 years old now.
So I figured chicken coop shouldn’t be too hard 😅
I have built 3 thus far. First was Chateau d’If : predominantly from palettes, and a little reused ply wood. We had some old roofing bits sitting around property from other projects. Only thing I paid for material wise have been screws, hinges and door hooks.
The roof slab was a little smaller than the house (I used a sturdy palette for the floor) so I lined under the roof with this thick plastic sheet (it was sitting in the bush next to the driveway- presumably previous property owner used it to cover a pile of wood or something). Had some minor tears, but usable enough- stapled that down.
Alcatraz DEFINITELY used the most hardware and screws. As a trainee builder friend said “when you don’t plan/know what you’re doing, you OVERENGINEER”. That I did. But it’s sturdy and keeps them dry. I did have to do some creative stuff (with perches- I didn’t consider the clearance needed for perch and so it had to be far enough from the wall so it would have to be attached to where the door is, so I did a perpendicular block of wood attached the wall, past the door to attach perch to. Which meant I had to cut away a part of the internal door frame so I could close the door 😅. It works, but it was a lot of extra faffing about.
This was intended for the roosters (we hatched and I raised the boys for meat). So no nesting box. It was also VERY heavy and quite tough to get into the paddock where chickens are: it’s raised on decent legs.
So when I went to make the second: Alcatraz. This is by far the nicest looking build of mine. I drew a plan, calculated sizes based on materials I had: largely from recycled free plywood’s, has 3 nesting boxes, and I learnt from my mistakes and planned the door around perches. I also put them at same height (Chateau d’If has two- one along the short edge that’s higher, and the over engineered that’s long and lower- and there are squabbles over who is top perch, and lower perch chicken in a particular spot gets pooped on. Also the door hinge is on the west side of the door and so it gets rained into when weather is especially bad. )
So I did a split door (hence why it’s called Alcatraz), top part opens up and can be used as sort of overhanging roof, bottom part hinges like a house door, and can be left open with bad weather. Between the two sections it’s big enough (just) for me to lean in during cleaning.
I also learnt the hard way about cleaning the first- when I had red mites. Over engineered coop has ALOT of cracks mites could hide in. Cracks that now get dusted with DE. And the floor is wood.
So the floor in Alcatraz has the plastic wrapped and stapled on- cleaning is an easy scrape and a wipe with cloth if need be.
I should have had the roof further hang over the nesting box lid- as it were water during major rain runs down the side of the coop and onto the hinge: I had to use the plastic and filler to waterproof the hinge 😅
I learnt the hard way about weight, so I built it as three pieces and assembled on site. It’s pretty functional and looks decent but it needed tweaking.
Final one: Sardine Box.
About half the hens prefer Chateau d’If over Alcatraz for sleeping. I didn’t have the heart to take it into the adjacent enclosure when I separated meat roosters from them. So I built Sardine Box. Single small pallet floor, two perches. The height of walls is enough for large breed roosters to perch. But not enough to stretch into a crow (by chance and materials, not by design). Whole thing is from disassembled pallets, and the roofing is plastic (as you’d have over a porch) as opposed to metal sheets). It only needed to last three or four months. It fits four-six roosters comfortably, but I had 9 in uncomfortably 🤣.
I haven’t removed it after Roos got the axe- I opened up hen enclosure to include the rooster space and leave Sardine Box open- I have this and a partially open “chicken porch” for shade and general hanging out. I think I will use it next year- I plan on letting one of my frequent broody hens have babies- this will be easy to put a little fence around it, and is not as far off the ground, so will work for a mamma and babies.
I have kept 2 magnificent Roos so have fertile eggs.
Our chickens are fully enclosed (I run a dog daycare and deer fenced 6′ dog fence keeps the dogs in- but the chicken space is 3 or 4 from the corner of the dog space). So I keep dogs in and chickens in.
Chickens have construction site temp fencing, and chicken wire along posts to about 1.8m height. They can technically get out (they get on top of the coop and can glide out from the top of it) but they haven’t since the meat Roos are gone- they now have a large enclosure (maybe 10x20m) for 9 hens and 2 Roos. And they’re large breeds (orps, Rhode Island reds, barnavelder, faverolles, and one roo is wyandotte) so they’re not super flighty.