

Growing from seed is one of my favourite parts of gardening. In theory, I can grow anything, as long as I have a seed to sow.
But some people struggle to get the hang of it. So this post will help you understand what I do, what equipment I use, and how to get those suckers to sprout.
What you need
Apart from your seeds, you need some equipment to make your seed sowing more successful.
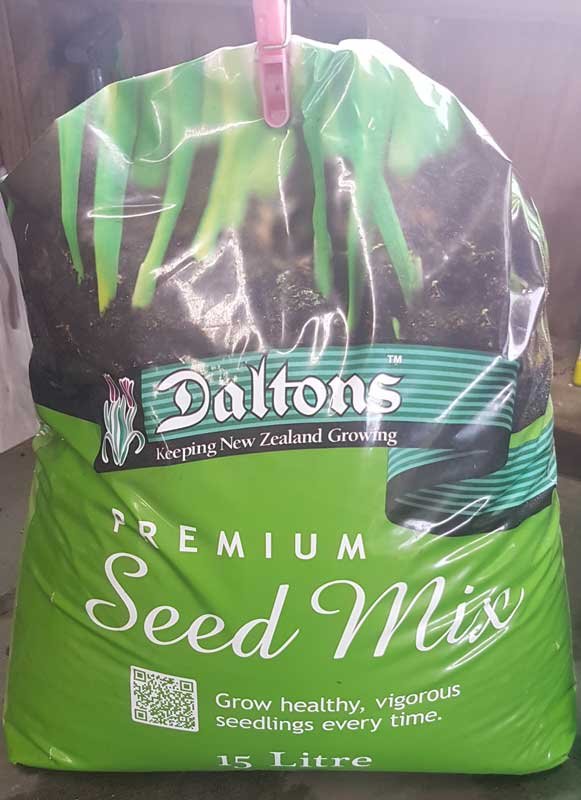
Seed raising mix is finer than potting mix, compost, or soil from your garden. It contains things that are light and small. This helps the young plant push up, and its young roots to expand easily. It also contains no weeds, so you can be sure your plants are the seeds you sowed.
Your seed raising mix can either be organic or not organic. The difference is in the additives. An organic mix won’t contain any fungicides. Fungicides are added to non-organic seed raising mix to help prevent dampening off, which is when your seedlings basically curl up and die for no reason (the reason is a fungal infection).
A small 5 litre bag will set you back $5-8, and will be heaps if you’re starting out.
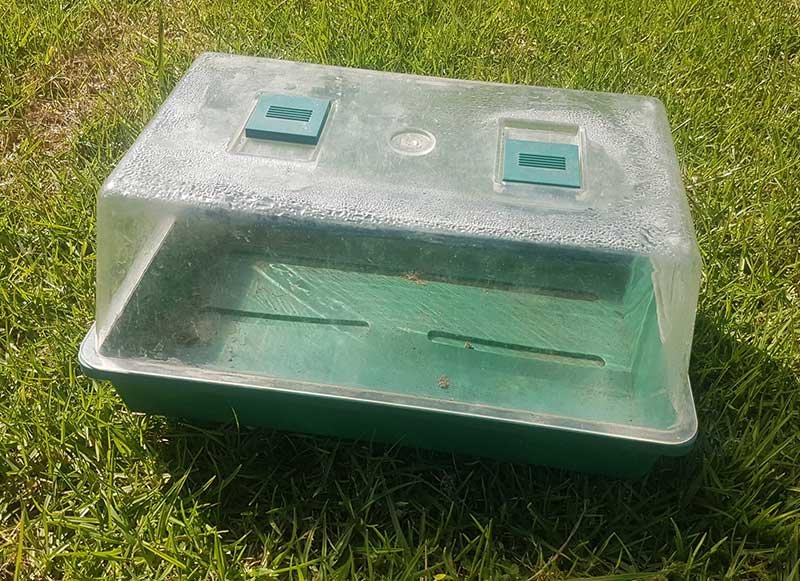
A propagation house will hold 6 of the small seedling trays. It will help increase the humidity surrounding your seedlings. This helps the seeds germinate and grow.
I've searched up and down everywhere and I haven't found a better deal than these $9 "mini greenhouses" from Bunnings. We have 10 of them now and have had several growing seasons from them.

For most urban gardens, one of these small seedling trays is enough room. It's unlikely you want 200 plants, so you only need enough space for the few you actually want to grow.
You might already have these trays as they're often sold to you with seedlings in them. Sometimes you can pick them up in the 'pots for recycling' area of your local plant store.
Make sure you clean your pots to avoid transferring bacteria and fungi to your new seedlings. Normal dishwashing liquid is sufficient.

I really recommend these watering attachments for seed raising. They fit onto most plastic drink bottles and are available on Wish or AliExpress for a few dollars. They provide a nice flow rate which works well with baby plants.
The cheaper option is to soak your soil before you plant your seeds by carefully dunking it in a shallow tray of water. Daily watering can be done using any clean misting spray bottle.
Labels are pretty helpful to know what you planted, and when you planted it.
We are unable to recycle our #5 plastic in our region. For us, we get a lot of it in the form of our Jimbos catfood containers. Turns out they're perfect for re-use as labels when you cut off the top, and then into strips.
A Sharpie or Vivid for writing on them is also helpful.
Size matters
Every seed is different. Different colours, shapes, sizes. And they all need different things to grow. One of the first indicators of knowing what the hell to do with a seed is to look at its size.
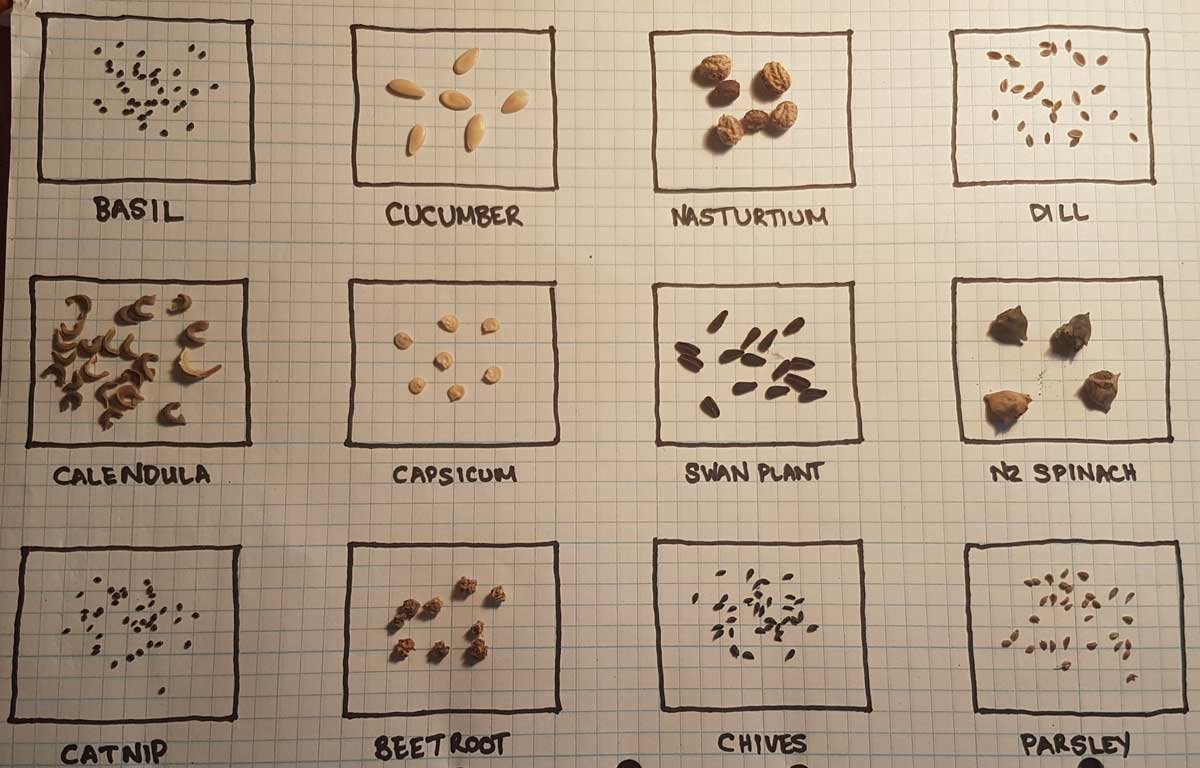
The general rule for planting seeds is to plant them 2 times as deep as they are tall. Looking at the photo above, NZ Spinach and Nasturtium have some of the biggest seeds there. They need planting fairly deep in the soil. Other seeds – like basil and catnip – are tiny. Basil I only just cover with a sprinkle of soil. Catnip I just leave on the surface.
Water the soil both before you put the seeds into the tray, and after you have covered them.

Basil
Basil seeds are small, plant shallowly

New Zealand Spinach
Larger seeds need to be planted more deeply.

New Zealand Spinach
Covered with seed raising mix, labelled and watered.

Pour seeds into your hand
Just in case it comes out too fast!

Adjust as necessary
Don’t sow the whole pack – only what you need.

Capsicum
Evenly spreading seed will make it easier to prick out your seedlings later.
Seed care
Once your seeds are planted and watered, they need light and warmth. You’ll need to water them each day until they germinate. The length of time depends entirely on the seed, but many will be up in less than a week. All but the most stubborn will be up within a month.
Bunnings have great propagators at the best price I’ve found ($9 each). Putting your seeds into one of these will really improve your success rate. We have 8 or so and they've been going for a few years now.
The cheapest option is to cover your trays in glad wrap, or if you have a takeout container with a high lid, that will work too. Poke a few holes through your ‘roof’ so water vapor can escape. Remove the gladwrap/lid when the seeds begin germinating. Clean plastic meat trays from the supermarket make great drip catchers too.
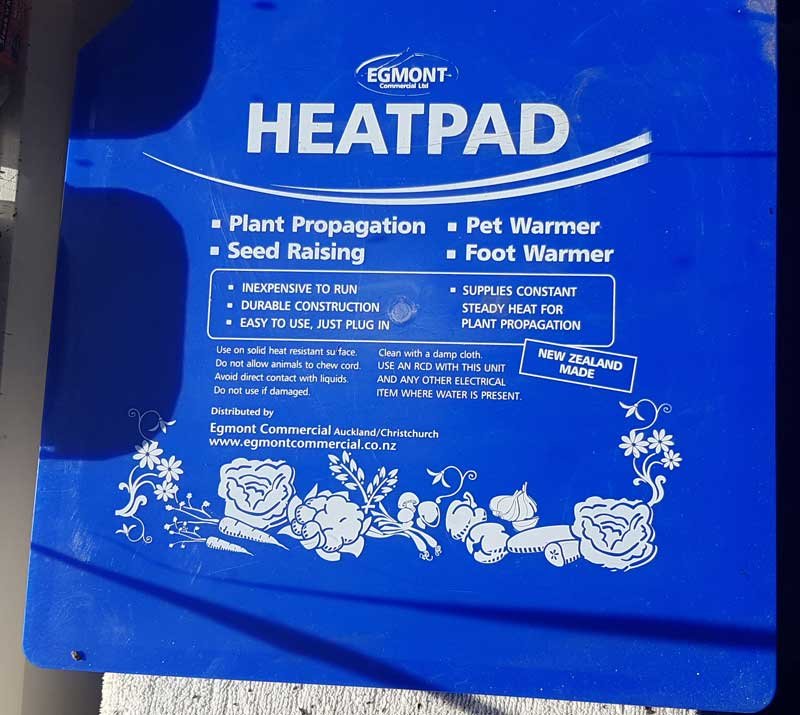
I have a fancy heating pad for the seeds that do better with a bit of warmth under their bums. It was expensive and it took me ages to decide to invest in one.
If this is your first time around, don’t spend the money on this, the heat-pad is nerd-level gardening. I’ve read you can get a similar effect by putting your seeds on top of the fridge though (let me know if you try this and it works!)
Seeds are picky
Sometimes, it pays to do a little bit of research on your seed before you plant it. Some companies are better at providing this information than others. Some seeds like to be chilled before they’ll germinate. Others have low germination rates and you have to plant the entire pack to get a couple of plants. Occasionally they take months and months of watering bare soil before they decide to wake up. Sometimes it’s a dud pack and nothing ever happens.
Most common vegetables don't require special treatment, but some herbs and flowers do.

READ NEXT
Pricking out seedlings
Once your seedlings have sprouted, they'll need more room to grow. Learn how to 'prick out' your seedlings prior to planting in the garden.

READ NEXT
Should I buy seeds or seedlings?
Seedlings can massively reduce the effort your garden requires, but seeds give you more options to grow.

READ NEXT
Direct-sowing guide
Skip all the palaver and just sow your seeds straight into the garden. When to do it, and some tips!
Related content: gardening · grow guide · growing from seed · potting mix · propagation · seed sowing · seedlings · seeds · transplanting
Stay in touch?
The Kat's Garden newsletter gives readers an extra peek behind the scenes. It's the best way to know when new posts go live, and what's happened since.
If you like what you've seen, join us and see what we learn next.
