
It’s officially autumn in Aotearoa New Zealand. We’re heading towards shorter days and cooler conditions.
Summer harvests are rolling in, and it’s time to start turning our attention to our winter gardens and saving seed for next summer.
General tasks for March include:
- Planting winter brassica, leafy greens, and root crops.
- Preparing for planting garlic – improving garden beds and sourcing seed stock.
- Harvesting and preserving summer crops including pumpkins, tomatoes, potatoes, kūmara, as well as early apples and pears.
- Pruning stone fruit trees.
Zones
Some districts can get away with things others can't at different times of the year.
Living in the Far North, I have a very long growing season and can still grow some things my friends further south don't have time for.
So where necessary, I'll be referring to the zones shown on this map if the advice only applies to some areas.

What to plant
All the brassicas! No matter where you are, it's time to fulfil your hearts desire for broccoli, cabbages, cauliflowers, brussels sprouts, kale, kohlrabi, and Chinese cabbages such as pak choi.

These veggies all prefer the cooler autumn and winter temperatures. But the warmth we still have right now gets them off to a good start.
Make sure you protect them from white butterfly - the best way is to cover them in a bug net. The one shown above is from The Warehouse and placed over cloche hoops.
They'll also need some protection from slugs and snails, so some snail bait is also recommended.
You can squeeze in some leeks if you buy seedlings and do it ASAP - check out my planting guide.
They'll be a little later to develop, but should be harvestable by mid-winter through to the end of spring.
Winter lettuces like cos, oak-leaf, or buttercrunch can be sown and/or planted out. As can silverbeet, spinach, rocket, radish, and mesclun mixes.
If you live in Zone A, you can also get away with direct-sowing carrots, beetroot, and onions. They actually grow pretty great together.
As your summer beds die back, you might want to consider a round of green manure. This will create biomass for your composting efforts, hold back weeds, and improve soil structure.
The Kings Seeds autumn green manure mix is a good choice. The Kōanga Soil Builder mix also looks great.
Preparing to grow garlic
You can start planting garlic anytime from April to July. So now's a good time to find your seed garlic.
While retailers have been branching out in more recent years, the most common garlic variety you’ll find in New Zealand garden stores is called Printanor.
Growers in warmer regions like Zone A should avoid Printanor, especially if you’ve faced problems with growing garlic in the past. Look for literally anything else, and your chances of success will go up. Specialist sellers carry a number of varieties.
As I write this, Setha's Seeds and Blue Terrace Garlic haven’t released their 2025 stock yet, so it’s worth signing up for their mailing lists. Te Mata Garlic are in stock, and I’ve sourced 4 varieties there for my own growing season this year.
Kōanga Institute offer their stock to members first, but that's a great investment if you're serious about your garden.
Use your best-draining bed for garlic. Good drainage is the #1 thing you can do to reduce the chances of rust.
Then, start preparing your soils. If you have at least 3 months before you're planning to plant, think about getting a green-cover crop sown this month.
If you don't have time for that, layer on the organic matter as soon as possible. Compost, seaweed, worm castings, grass clippings, aged wood mulch, manure - use what you have.
Doing it now gives it time to break down and incorporate into your soils. Increase your calcium with a good sprinkle of lime too.
Harvests
Now we are entering autumn, it's time to squirrel away what you've managed to grow for the winter months. Most summer crops are coming ready for harvest.
Harvest and cure your potatoes and kūmara as they die back - check out my guide to harvesting and storing potatoes.
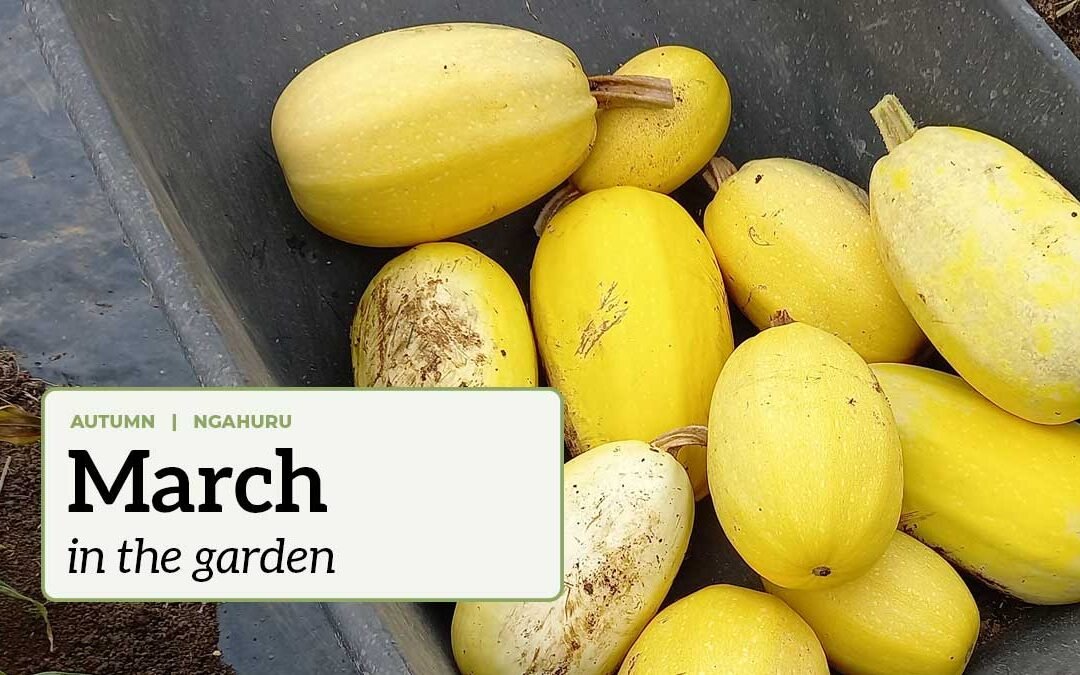
Your pumpkins can be picked and stored in a dark cool place once the stems dry off. Handle with care to avoid bruising. Wipe away any dirt and store on a wire shelf to provide a good air-flow.
You might be noticing your cucumbers, tomatoes, beans, and zucchini are wrapping up for the season. That's perfectly natural. These are annual plants that only grow over summer.
Sometimes tomato plants die off before the fruit has fully ripened. You can bring the tomatoes inside and allow them to ripen on a windowsill. Bonus points: it helps keep the bugs and birds away!
Tomatoes can also be stored in the freezer - they don't strictly need any preparation. Freeze whole on a tray, and then transfer to a bag or container once frozen. Use in soups, stews, and sauces throughout the year.
Allow your last beans to fully dry on the plant. They can then be harvested and stored dry in a glass jar - either for use over winter, or as seeds next year.
Finally, a lot of seeds are ready to harvest at the moment. I've found myself harvesting cilantro, dill, leek, sunflower, and parsley seed this week. You can either sprinkle it around your garden to grow when and where it's ready; or dry, process, and store it for next season.
Apples
Our apples are starting to be ready for harvest. Depending on where you are and what you grow, yours may mature any time over the next couple of months.
The surest sign to know they're ripe is to cut one in half and see if the seeds are dark brown. If they are, they're ready.

A couple of our windblown apples. On the left, this apple isn't ready - the seeds are still white. On the right, they are almost there, but they're not quite at dark brown. They are both juicy and made a great apple crumble regardless.
We've been enjoying some of the earlier wind-blown fruit in both my apple crumble and sponge-top pudding lately. There really is a warm fuzzy feeling that comes with a home-made dessert using home-grown ingredients.
If you have any diseased or windblown fruit under your fruit trees, you need to pick them up. Leaving them to decompose under your trees provides a place for pests and fungal spores to over-winter and come back with vengeance next year.
We feed all our apple waste, including rotting fruit, to our chickens. They take care of the pests and enjoy the treat!
If you have diseased fruit, it's probably better to remove them from the property via green or organic waste streams. They'll be commercially composted and the spores and pests won't survive the heat.
Stone fruit
Stone fruit harvest should be starting to wrap up this month. Once your tree is clear of fruit (including the mouldy ones), it's time to prune.
Unlike apples (which are best pruned in winter while they're dormant), stone fruit should be pruned while the tree is still active enough to re-seal the cuts.
Pruning stone fruit after harvest helps prevent fungal infection, and so does pruning paste. You can buy this commercially, or you can make it at home - check out my pruning paste recipe.
If you're not sure what you're doing, I'd highly recommend a copy of Kath Irvine's Pruning Fruit Trees for your home library.
Citrus
I'm expecting our citrus to start ripening in about 6 weeks, so now's a good time to give them a good final feed for the season.
It's also a good time to spray for pests and diseases with Copper Oxychloride (for fungal disease) and/or horticultural oil (for scale and aphids) if you’re facing problems.
Sprays should never be sprayed on a sunny day. The oil combined with the sun's heat can cause the leaves to burn. Choose an overcast day, or late evening before sunset.
You can learn more about citrus care in the citrus care guide.
Those living in Zones 2 and 3 with citrus can safely begin pruning towards the end of the month.
Berries
Starting this month, I’m expanding the monthly garden guide with a section on berries. I’m going to focus on Rubus spp. berries (raspberry, boysenberry, blackberry), strawberries, and blueberries.
These are three different sets of plants, with different care requirements. The great news is there’s not a whole lot to do this month.
Rubus berries are busy growing canes for next season. If you can get in there (I can’t) and tie them up to your support structures, great. But otherwise the main work for them comes in a few months once they lose their leaves.
Blueberries will be coming toward the end of the harvest season and there’s not a lot to do there this month either.
Strawberries are busy putting out runners. If you’d like new strawberry plants this year, or you’d like to make some cash selling them, then encourage these into new soil.

Anchor them with some landscaping pins and they’ll set roots in a few weeks. Do not cut them off from the ‘mother plant’ until you are sure they’re rooted and self-sufficient.
If you’d like to try encouraging your strawberries into an autumn flush, they’re more able to do that if they’re not supporting runners. So clip them (or the majority of them) off where they meet the mother plant.
Give your plants some liquid fish or seaweed fertiliser, and top up your mulch. You should see something soon.
Go forth, and garden
I don't know about you, but I never manage to tick all these things off the list on time.
Still it's about doing what you can, when you can. An hour spent planting and protecting your broccoli now will mean you're eating the freshest food in a couple of months.
A bit of time tending to your peach tree this weekend will mean a bigger, juicier crop next year.
It's worth finding a bit of spare time and getting outside while the sun is still warm and shining.

READ NEXT
February in the garden
Summer crops come in thick and need storing. Seed saving for next year begins while your earlier plantings continue.

READ NEXT
April in the garden
Establishing winter brassica, securing seed garlic, tiding up strawberries, and harvesting pip fruit.
Related content: apples · beans · beetroot · berries · blueberries · boysenberries · brassica · broccoli · carrots · cauliflower · citrus · Far North · food preservation · fruit trees · garden · gardening · garlic · green manure · harvesting · insect netting · Koanga Institute · kūmara · leeks · lettuce · New Zealand · onions · pak choi · potatoes · pruning · pruning paste · pumpkins · radishes · raspberries · seed garlic · seed saving · silverbeet · snail bait · soil health · spinach · stone fruit · strawberries · tomatoes · white cabbage butterfly
Stay in touch?
The Kat's Garden newsletter gives readers an extra peek behind the scenes. It's the best way to know when new posts go live, and what's happened since.
If you like what you've seen, join us and see what we learn next.
