
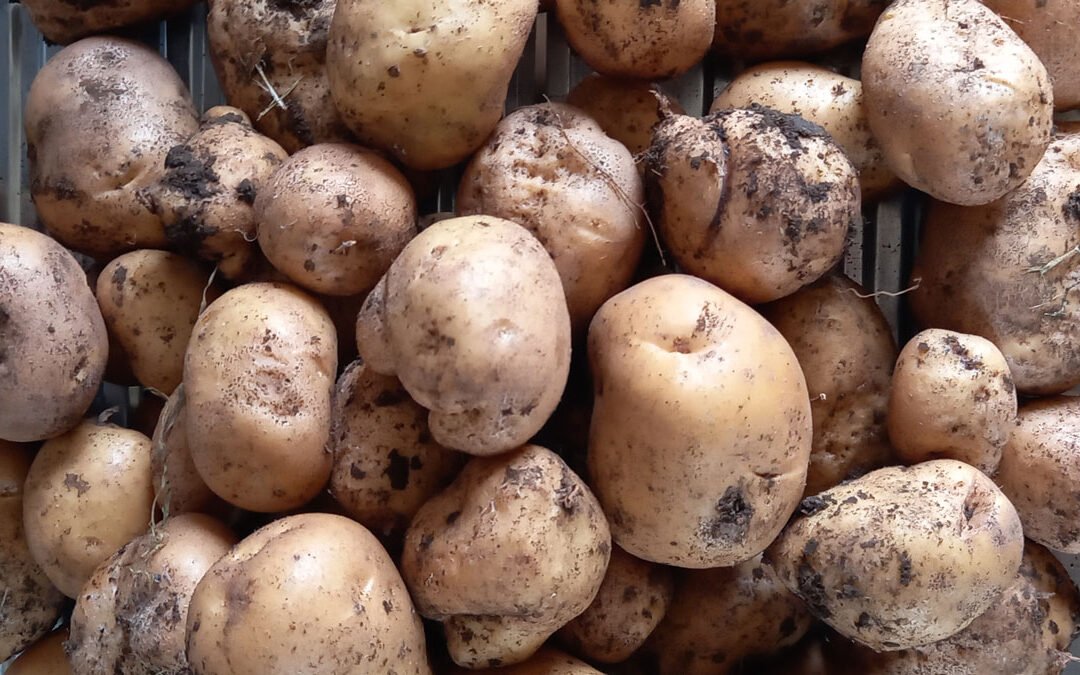
Harvesting potatoes is one of our favourite jobs around the farm. They're one vegetable we are pretty much self-sufficient in, and a topic I've written a few posts about.
While we used to grow from certified seed potatoes, we now run a 'closed-loop' system where the previous season's harvest becomes the new season's seed without outside inputs.
But we grow enough to feed ourselves for most, if not the entire year.
Sometimes we need to buy a bag between using up our stored potatoes in winter and beginning harvest of our new potatoes in spring.
It's always a surprisingly disappointing experience. In my opinion home-grown potatoes taste better. So mostly, we eat what we grow.
We grow early and main crops. Early crop gets planted in late winter to begin harvesting in spring. Early crop varieties are more cold tolerant, and often mature faster. But they do not keep well, so we eat them straight out of the garden.
The main crops are grown in bulk over summer. We let them grow until they die back. Then they're lifted, dried, and stored to get us through winter.
We tend to grow Agria and Desiree potatoes as our main crop. We like Agria, but they can be a little unreliable and sometimes susceptible to disease. Over the last couple of years we've found Desiree to be more prolific, and just as delicious.
This post covers harvesting potatoes, and how to process them to keep you fed during the colder months.
Jump to section
1. When can you harvest potatoes?
2. Don't fork it up
3. Sorting your potatoes
4. Curing your potatoes
5. Growth inhibitors
6. Storing your potato harvest
7. Eat 'em
When can you harvest potatoes?
Potatoes can be lifted and eaten as soon as you feel they are big enough. In varieties that flower, that's often the signal there's something to find underground.
Just dig around a bit. The plant can continue to grow even if you harvest dinner from them. These are fresh potatoes and they will have a delicate skin.
But if you want to store your potatoes for a few months, then it's important to wait until your main crop has died back before harvesting.
This will happen about 3 to 4 months after you plant them, and ensures the skins are a bit tougher to help with storage.
This year our potatoes came out a month late. When storing spuds, you want them to be as dry as possible when you pull them up. Just as the plants were all lying there dead, we got 2 weeks of bucketing rain.
So we had to wait. Dry conditions make the whole process of harvesting potatoes a bit easier (no clumping, sticky dirt), and reduces the risk of damaging your spuds as the skins have a chance to harden off a bit. This is one of the reasons why a lot of rain at harvest time can cause a national chip shortage.
Exposure to sunlight can cause greening, which if eaten can make you ill. To avoid the that, I mowed the lawns and dumped half a dozen loads of clippings on the potato bed.
This ensured that any spuds near the surface were protected from the light. Then, we waited.
It's a risky strategy. In the future I'll watch the weather forecast more closely as excess moisture can cause the tubers to rot in the ground. I probably should have lifted them a little earlier rather than later to be on the safe side, but I got lucky.
Don't fork it up
Harvesting potatoes is one job Richard and I never need any encouragement to get out and do. It's probably the most fun job we have—like a treasure hunt. If you consider a huge bucket of potatoes to be 'treasure'.
Three weeks after the rain had buggered off, it was dry enough to pull the spuds out.

The garden fork is usually our implement of choice, but there's a wee trick to avoid putting the tines of your fork right through your potatoes (it's always Richard who forks them).
Start about 25cm back from the stem, push your fork in, and lift. You should miss the spuds, while levering the potatoes up to pick out by hand.
If you do put your fork through them, put them to the side and eat them for dinner as soon as possible. They won't keep.
Sorting your potatoes
Once your potatoes are out of the ground, they'll need sorting. I usually have four categories:
Keepers: perfect condition. No greening. Firm. Exactly as a potato should be.
Eat now: maybe a bit soft, or with minor skin damage. Forked potatoes. Anything that's not-quite good enough for storage.
Minis: little potatoes (usually under 15mm). I tend to cook these together as a specific meal soon after harvest rather than let them fall to the bottom of the bag and sprout. Great roasted whole, or used to make a potato salad.
Wastage: green potatoes, potatoes too damaged to eat.

Eat now potatoes - look fine but have various imperfections.

Minis - tiny potatoes - try to get as many as possible to avoid potatoes becoming 'weeds' in your garden!

Wastage potatoes - rejected for being yucky or poisonous.
Get to work eating your 'eat now' and 'minis'.
We throw our 'wastage' into the worm farm—where we tend to harvest a couple of extra kilos each year as they decide to sprout and grow.

This summer's wormfarm harvest was fairly decent - and most definitely delicious.
If you have diseased potatoes, make sure they do not go back into your composting systems.
Curing your potatoes
Your "keepers" really need to be the best of the best. Because you want them to stay good for months, you don't want to risk a slightly-damaged potato causing trouble for the rest of them.
If in doubt, eat it sooner rather than later.
Spread your keepers out in a single layer in a dark, warm, airy place.
You'll want to keep them here a week or two, but not longer. This is called 'hardening off', and you're giving the skins a chance to dry off and toughen up.
Once fully dry, any excess dirt should brush off easily and it'll be time to move them into storage.
Growth inhibitors
At this stage, you have the option to apply a growth inhibitor. This will prevent them sprouting. You might have noticed a specialist propham inhibitor at garden stores. It usually costs under $15 and will last a few seasons when stored correctly.
It's up to you whether you want to use it. You've almost certainly been exposed to it when purchasing potatoes in stores. It will offer more flexibility in your storage location and increase the storage life.
But it's worth noting it's been recently banned in Europe. Make sure you wear a mask and be conservative with your use. Wash your potatoes before preparing them for eating.
Avoiding agricultural chemicals like this may be the reason you grow your own veggies in the first place. If you choose to not use it, then you'll need to be careful to get the next steps right in order to get the longest storage time from your spuds.
Storing your potato harvest
One day I will build a potato storage bin. But until then, hessian sacks are my go-to.
I picked a couple of hāngi sacks up from Geoff's Emporium in Whangārei for a few dollars. Because they are quite thin, we put one inside the other to form a double layer. It works well enough for us and those sacks have been going for more than five years now.
Failing that, a cardboard box will also do the job. Line the bottom with some newspaper and make sure the top is also light-proof.
You need to find a dry, cool place. You can get quite technical at this point and build a root cellar and store them in sand or some other medium to keep the humidity just right.
But honestly? That sack at the bottom of our pantry works long enough for us to get through to our new-potato harvest in spring. Potatoes are still edible if they're sprouting or a bit wrinkly.
Warmth and light will trigger that sprouting, so keeping them cool and dark is the main thing.
Eat 'em
For us, the length of time they last is mainly down to how many we pull out of the ground. It truly breaks my heart when I have to find them in the supermarket.
Each year I'm working to find the right number to plant, and to get them in at the right time to ensure continuous supply.
As we live in the Far North, our planting cycle can begin again in late July with the first harvests in September. So we have no need to make the storage complicated—we grow them, we eat them.
As long as they aren't green, rotten, or diseased internally, we'll probably eat them.
I think the main reason I love growing potatoes so much is I love eating potatoes.
One of my biggest tips for new gardeners is 'grow what you eat', and potatoes are an all-round joy to grow—and eat.

READ NEXT
Planting potatoes
Figure out the best type of potato to plant for your kitchen, and how to grow them in the first place.

READ NEXT
Choosing seed potatoes
Still trying to work out the difference between an 'early' and a 'main' crop? No idea which potato makes the best mash? Check out my guide to choosing seed potatoes.
Related content: Agria · curing · Desiree · Far North · garden · gardening · grow guide · harvest · home grown · potatoes · seed potatoes · self-sufficiency · storage · vegetables · worm farm
Stay in touch?
The Kat's Garden newsletter gives readers an extra peek behind the scenes. It's the best way to know when new posts go live, and what's happened since.
If you like what you've seen, join us and see what we learn next.
