
I’m a HUGE fan of worm farming. It’s a great way to take your household rubbish (not just food waste) and turn it into your own garden and plant fertilisers.
In today’s economy, that’s a saving on both your household waste bill, and your gardening inputs.
Worm farming by-products (called worm tea and vermicast) can be a real boost to the health of your soils and plants, resulting in even more savings as you grow (rather than buy) better fruit and veggies.
Jump to section
1. Benefits of worm farming
2. Tiger worms
3. Types of worm farm
4. Sourcing a worm farm
5. Where to keep your worm farm
6. Bedding material
7. Feeding your worm farm
8. How much to feed your worm farm
9. Worm farm problems
10. Emptying your worm farm
11. Using worm farm by-products
12. Worm farming resources
Benefits of worm farming
Worm farming is flexible and can be done at any scale, in any household. If you live in a small space, you can do it on a small scale—even under your kitchen sink! Or if you have a larger household, a larger farm will easily serve your needs and provide even more vermicast and liquid fertiliser for your plants.
It’s great if you’re a renter because worm farms are portable. They can be kept indoors if you don’t have the outdoor space, making them accessible to apartment dwellers. A worm farm is generally tidy and free of nasty smells.
The set-up cost can run from free to a few hundred dollars, depending on how you go about it. There’s no ongoing cost at all. Once your worm farm is set up, you should be able to manage the rest with what you have.
Once your worms are settled in, your worm farm will need a couple of hours work every 4-6 months to harvest the vermicast and re-set, but mostly they just hum away in the background, eating your scraps and producing liquid fertiliser and worm castings to use in gardens or on indoor plants.
At its absolute basic formula: tiger worms + food + air + moisture = vermicast
The trick is to learn how to keep your worms happy.

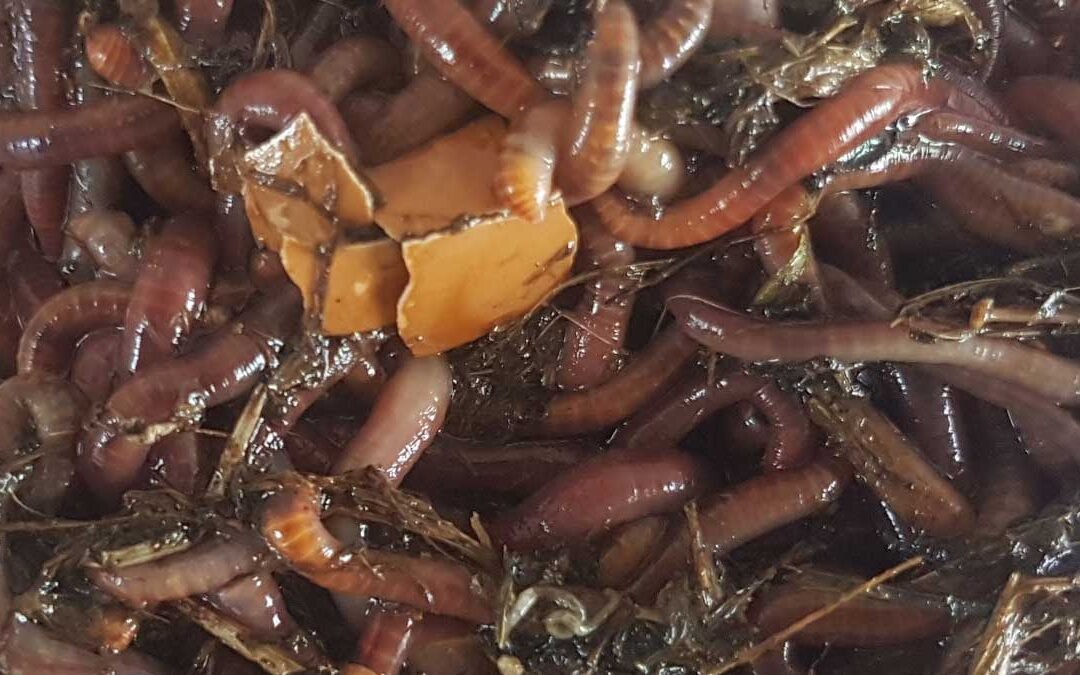
Tiger worms
Not just any worm will work for worm farming. You need a population of composting worms.

There are a few types, but the one used mostly in New Zealand is Eisenia fetida which are usually called ‘tiger worms’ here, but other countries call them ‘red wrigglers’.
The best way to start a worm farm is to take some tiger worms from another worm farm. Many people are happy for you to take them for free, but you’ll also find them for sale on TradeMe (but not Facebook Marketplace, who don’t allow live animals).
If you don’t know anyone who has an existing worm farm, then I highly recommend Amberley Worm Ranch (Instagram, TradeMe). Sharon takes more care than most in providing the best worms.
There’s also WormsRus.
Types of worm farms
The two major types of worm farm are called ‘stacked’ and ‘continuous flow’—our bathtub worm farm is a form of ‘continuous flow’.
A third type exists—‘in ground’ worm farms are buried directly into your vegetable garden. They are a form of continuous flow worm farm—but with even less work. As you feed your worms scraps, they transfer their processed products directly into the soil. I've been experimenting with this type of worm farm, but won't go into it much in this post.
A good worm farm is dark, blocking the light and protecting your worms. It should sit somewhere the temperature is usually between 15 and 25ºC. Your worms will survive between 0 and 35ºC, but they won’t thrive.
It needs to have some kind of cover to prevent too much rain getting in, and a way for worm tea to drain out the bottom.
Stacked worm farms

Stacked worm farms are a series of bins that are stacked on top of each other. Once the first bin is full, a new bin is put on top of it and the worms allowed to migrate up to new food.
By the time the second bin is full, the vermicast in the first bin is ready for collection.
Continuous flow worm farms

Continuous flow worm farms can work either vertically (for example, a ‘Hungry Bin’), with new food placed on top and vermicast extracted from the bottom.
Or they can be horizontal (like our bath), with new food placed on one side while finished vermicast is extracted from the other.
Sourcing a worm farm
As I mentioned in my introduction, setting up your worm farm can range from free to a few hundred dollars. The major expense (aside from worms) is the worm farm itself. You can purchase a pre-made worm farm, or you can make one.
We started with a manufactured stacked-system worm farm. It was a great ‘beginner’ unit, and I happily passed it on to family when we upgraded.
There are a huge range available at hardware stores and online.
Your other option is to make one. You can use all kinds of materials—purchased or recycled. There’s no right or wrong answer to this, but building a worm farm is certainly a bit easier when you know at least a little about worm farming.
There are all kinds of guides available online, but here are a few of my favourites:
Stacked systems
Go Green Compost bucket-based worm farm
General guide to making your own stacked system
Continuous flow
Geoff Lawton’s bathtub worm farm is what we based our design on.
Sustainable Taranaki - Tyre worm farm
Where to keep your worm farm
Your worms need a level spot. Depending on the unit you have, you might need to put it on a stand to harvest the worm tea.
As mentioned earlier, your worm farm’s temperature should sit somewhere between 15 and 25ºC. Your worms will survive between 0 and 35ºC, but they won’t thrive.
Ideally, in summer your worms should be shaded. Place them on the south side of a structure (southern hemisphere), under a tree, or on a shaded balcony. This should prevent the summer sun from heating the farm up too much.
In winter, it’s about keeping your worms warm, so you may need to move your farm. If you live in a very cold region, you may want to bring your worms inside. In most regions, a frost-free spot with a bit of morning sun is ideal in winter.
From a convenience perspective, it’s good to have it somewhere close to your kitchen for easy feeding, and accessible to your garden for harvesting.
Bedding material
An ideal bedding material is porous, moist, and organic. Aim to fill at least the bottom 30% of your worm farm with bedding material.
Examples of good bedding materials include:
- Shredded newspaper or office paper
- Cardboard or egg cartons
- Straw
- Aged manure
- Sawdust (untreated)
- Fallen leaves
- Coconut coir
- Organic potting mix
- Topsoil
- Dry lawn clippings
- Natural pet bedding (e.g. rabbit straw or material from laying boxes).
Rip or cut large pieces of cardboard or paper down to at least the size of your palm. If you have a lot of paper waste, a paper shredder can be worth purchasing to break up your bedding material.
Soak dry bedding such as cardboard or straw in water for 10 minutes before use.
Feeding your worm farm
Here’s where it gets confusing. In general, it’s recommended you feed your worms 30% ‘brown’ carbon matter and 70% ‘green’ household waste.
But coffee grounds are considered a ‘green’ and dry grass matter is considered a ‘brown’. You could be forgiven for getting confused—it’s confusing!
Most of the bedding materials listed above are ‘browns’. Worms don’t know not to eat their bed, so you’ve got that covered. Most of the foods listed below are ‘greens’, and we’ve left 70% of the space remaining for them. Hopefully that makes it slightly easier.
Generally, the foods not recommended for worms are actually foods that are likely to attract vermin or make your worm farm smell bad.
Many references will say don’t add bones, but the truth is—if you don’t have a dog who will enjoy it far more—worms LOVE bone marrow. They won’t eat the bone itself, but they’ll have a little worm party inside it. However, a bone might also attract rats, or smell bad quickly.
Similarly, one lemon a week isn’t going to hurt your worms, but several kilos at once might! I’ve never pulled a recognisable lemon from my worm farm. The key is to go slow with these foods, rather than dump a whole lot at once.
With that in mind, I’ve divided the foods into a traffic light system.

A printable PDF version of this chart can be downloaded here.
Spread your food evenly over the surface of your worm farm, rather than in layers, or better yet—bury it in the bedding.
Worms prefer not to come to the surface, so burying it allows better access and faster digestion. Just rotate the spot where you bury it.
How much to feed your worms
Once you build your worm colony, you won’t need to worry about this as much. Generally, a full farm will keep up with your household’s waste (though, the larger your household, the larger bin you will need!)
But to begin with, you probably have a smallish number of worms who will need to settle in and breed before you can loosen up about it.
Worms can eat their weight each day in ideal conditions, but ideal conditions can be hard to attain.
To help them do their best, start out by feeding them their body weight in food each week. So, if you start with 500g of worms, you can feed them 500g each week.
Check in on them regularly to ensure they’re getting through it and as the population increases, so too can the amount of food you feed them.
Generally, it pays to feed them daily. Worms will migrate to new food quite quickly, especially when they’re hungry! Divide your weekly feeding weight into daily measurements—e.g. for 500g worms, that’s about 70g of food per day.
Worms won’t usually eat food at the very top of the bin as they don’t like light. Cover the top of your worm farm with something like a piece of old wool carpet, a coco-coir mat, hessian sack, old cotton t-shirt or towel, or corrugated cardboard.
You’ll find ‘worm blankets’ on the market which you can buy to do this job if none of these alternatives are at hand.
Worm farming problems
Firstly, if all your worms are at the top of the worm farm, it might not be reason to panic if you are expecting rain. Worms naturally move to high ground when they sense rain coming. They will move back down when the storm passes.
However, if that’s not your problem, then ask yourself if your worms are happy? Remember, to be happy a composting worm needs:
Check they have the above things, and fix if there’s something wrong. For example, if it’s too hot, move it somewhere cooler. If it is too dry, run some water through it.
Remember worms breathe air through their skin—the bedding should not be sopping wet! Add dry bedding material and stir through if there’s too much moisture.
Once you’ve got the basics right, most problems can be solved with a layer of bedding material and/or a dusting of garden lime.
Garden lime will neutralise the acidity of your worm farm. Composting materials can be quite acidic, and worms like a neutral pH, so adding some lime will address that problem. Untreated wood ash from the fireplace will also work.
If you notice bad smells, fluff up the worm farm to add oxygen and apply a layer of a bedding material. Carbon-based substances will reduce odour and encourage the worms to eat the rotting food.
If you notice the food actively rotting (e.g. maggots or mould), then you might be feeding too much. Cover with a bedding material and hold back for a while to let your worms catch up.
If you notice fruit flies or ants in your worm farm, it might be too acidic. Add a dusting of lime, wood ash, or crushed dry eggshells. Water through if your farm is dry. Cover with a bedding if your farm is moist.
Emptying your worm farm
Once worms have finished eating, they will move onto fresh food. When they are finished, they leave behind a substance called vermicast, and this will build up over time to the point where you can no longer add new food for your worms!
Once this happens, you need to remove your vermicast. The method depends on what kind of worm farm system you’re using.
In a stacked system, you’ll find the worms naturally migrate from the finished (lower) bin into the new one on top. Before or during rainstorms, you’ll also notice an upward migration and this is a great time to remove the finished bin.
If your worms are having trouble reaching the top, you may need to pack in some extra bedding material so they can travel up.
A vertical continuous flow system like a ‘Hungry Bin’ will work on the same principle—simply remove the finished vermicast from the bottom of the bin.
A horizontal continuous flow system (like our bath) needs a little more organisation. You feed on either the left or right side. When one side is full, switch your feeding to the other side and the worms should migrate across once they’re ready. When the ‘full’ side is mostly empty of worms, you can go ahead and remove the vermicast.
Worms will always move away from the light, so if you’re finding a lot of worms still in your vermicast, take it off in layers of 2-3cm. Wait 20 minutes between each layer.
Worms will naturally control their population, so if you remove worms as you harvest, they will breed to fill the gap.
Using worm farm by-products
The two main products from your worm farm will be worm tea and vermicast.
Worm tea is a brown liquid that is released from your worm farm. Worm farms include a drainage component so this doesn’t cause the worms to drown.
Collect your worm tea in a vessel and use it as a liquid fertiliser. You can water it down—the usual ratio is 1 part worm tea to 10 parts water. However you can also use it ‘neat’. It’s usually applied with a watering can near the roots of your plants.
Vermicast is the solid, dark soil-like substance left after worms have digested the food you have given them. It’s packed with organic matter, which when added to soils can improve moisture-holding capacity, improve mycelial networks, and increase microbial populations.
In perfect vermicast, you’ll no longer recognise any of the food components that you fed your worms, but if you’ve been feeding larger pieces, it might be a little less refined.
It can be mixed with topsoil or potting mix with your potted plants, as a mulch on top of your house plants, layered on top of gardens, or mixed into planting holes when planting trees or vegetables.
Really any place you need soil or compost, you can use vermicast as part of your mixture. I probably wouldn’t go above 25% vermicast in any mix—especially for potted plants—as it can get a bit ‘gluggy’.
To add quickly, you can add vermicast to water to create a ‘slurry’ and water this directly onto the rootzone of your plants.
Great worm farming resources
I found some excellent resources while writing this Deep Dive. Here are some of the best and most informative.
Free online course—Worm farming by The Compost Collective
Tumbleweed worm farming guide (PDF, 23 pages)
Understanding vermicompost and the benefits of worm castings Joe Gardener Podcast (55 minutes)
Complete guide to composting with worms by Kookaburra Worm Farms (PDF, 11 pages)

READ NEXT
In-ground worm farming
Installing permanent worm farms in one of my garden beds.

READ NEXT
Resetting the worm farm
Step-by-step resetting our bathtub worm farm.
Related content: compost · cost of living · deep dive · fertiliser · food waste · garden amendments · garden lime · gardening advice · how to · microbes · mycelium · potting mix · rural economy · scraps · soil improvement · tiger worms · TradeMe · vermicast · worm farm · worm juice · worms
Stay in touch?
The Kat's Garden newsletter gives readers an extra peek behind the scenes. It's the best way to know when new posts go live, and what's happened since.
If you like what you've seen, join us and see what we learn next.
