

In the middle of winter, the idea of fresh, juicy strawberries might get your mouth watering.
Here in New Zealand, we associate strawberries with Christmas. That’s because the main fruiting season runs from late September to early January. But the time to plant strawberries is now.
Don't be the person looking for strawberry plants in December because you see berries in the supermarket. The plants won't be there. June to September is the ideal time to plant your sweet, sun-ripened strawberries.
Your plants will establish over winter and be ready to bear fruit as soon as the soil warms and the days get a bit longer.
How many plants?
As many as you can fit! We grow around 50 for 2 people. That means we're freezing them, baking with them, making jam, turning up on Christmas day with them, eating them every day, giving them away, and even using them as dog treats.
5-7 plants per person is perhaps a more reasonable number if you'd like to have them for dessert a couple of times a week. Anything less than 3 plants per person and you'll probably only be grazing in the garden.
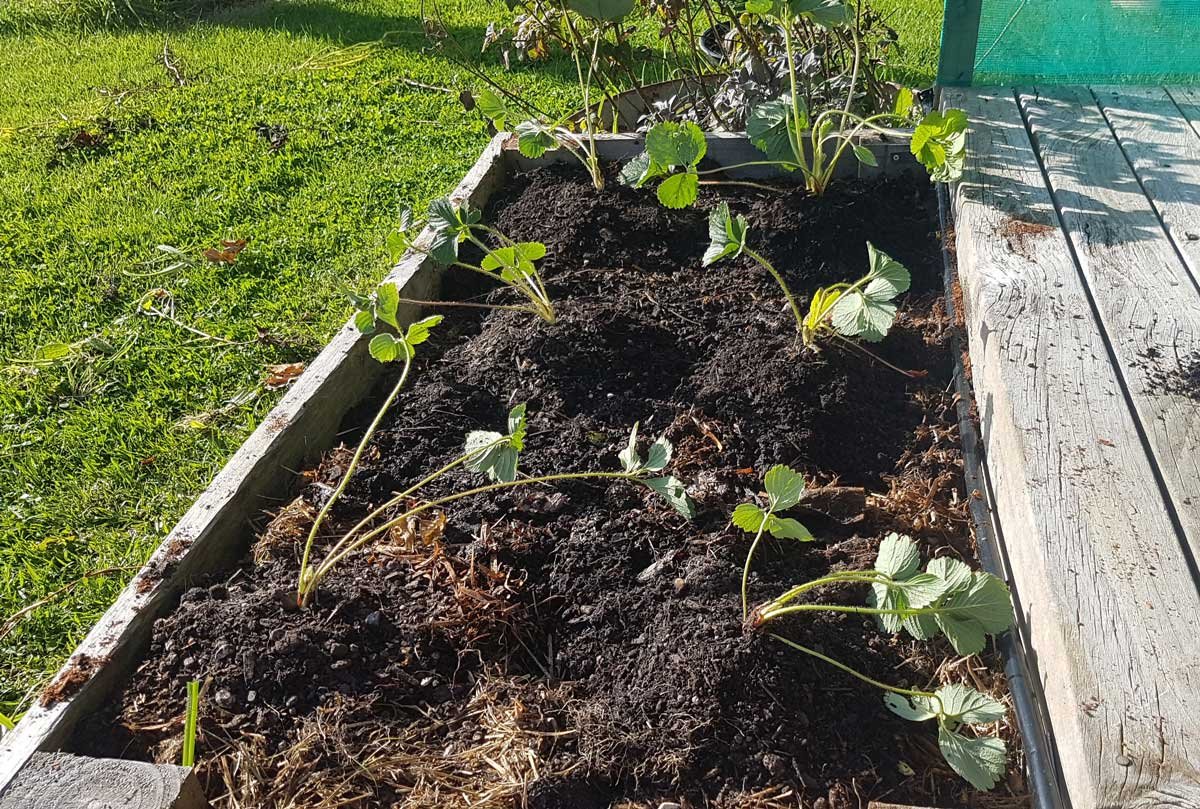
Preparing your patch
Strawberries can be grown in pots, raised beds, and garden beds. They're versatile for most situations. Your patch will last you at least 3 years if you prepare it right.
Pots and raised beds are best because their soil warms faster in the spring. At The Outpost, our beds are 'sunken-raised-beds', where I've dug out the paths around them.
Make sure your patch gets as much sun as possible throughout the day as more sun = more flowers = more strawberries.
Make sure the soil contains lots of organic matter. Aged manure is my favourite, but you could also buy sheep or sheep and chicken pellets, Dynamic Lifter, blood and bone, or compost.
One of my favourite manure sources is Zoo Doo - it’s available if your city has a zoo. Profits go to Working to Prevent Suicide, and they deliver!
If you're buying soil, it's worth buying a specialty strawberry mix as it has the right ratio of nutrients - though I'd still mix in some extra manure or compost.
Planting strawberries
There’s a few helpful tips when it comes to planting strawberries. The first is plant on a hill.
Strawberries don’t like their feet getting wet, and their roots are pretty shallow, so planting on a hill means better drainage.
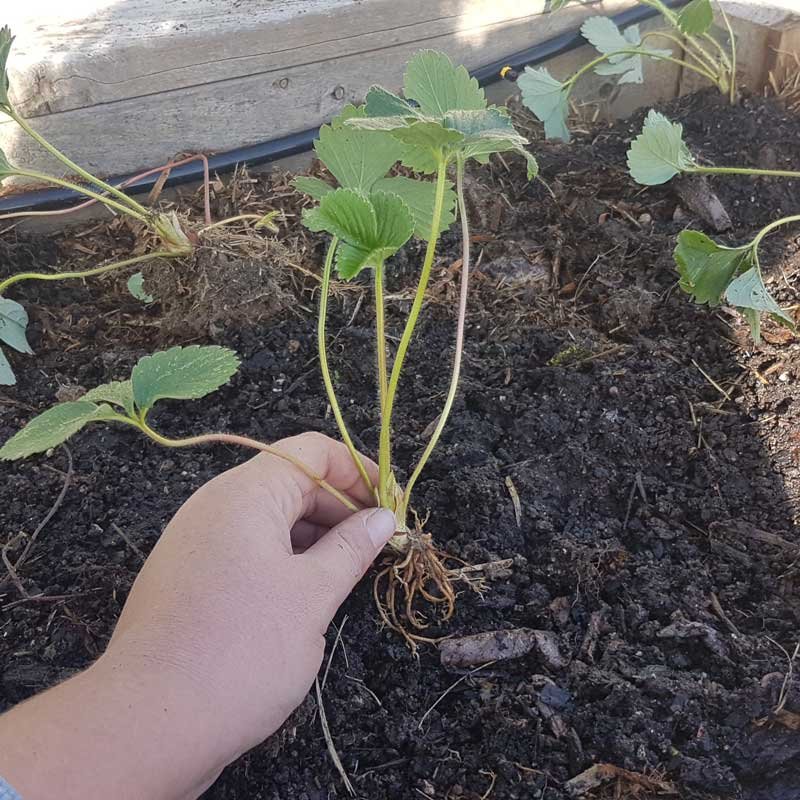
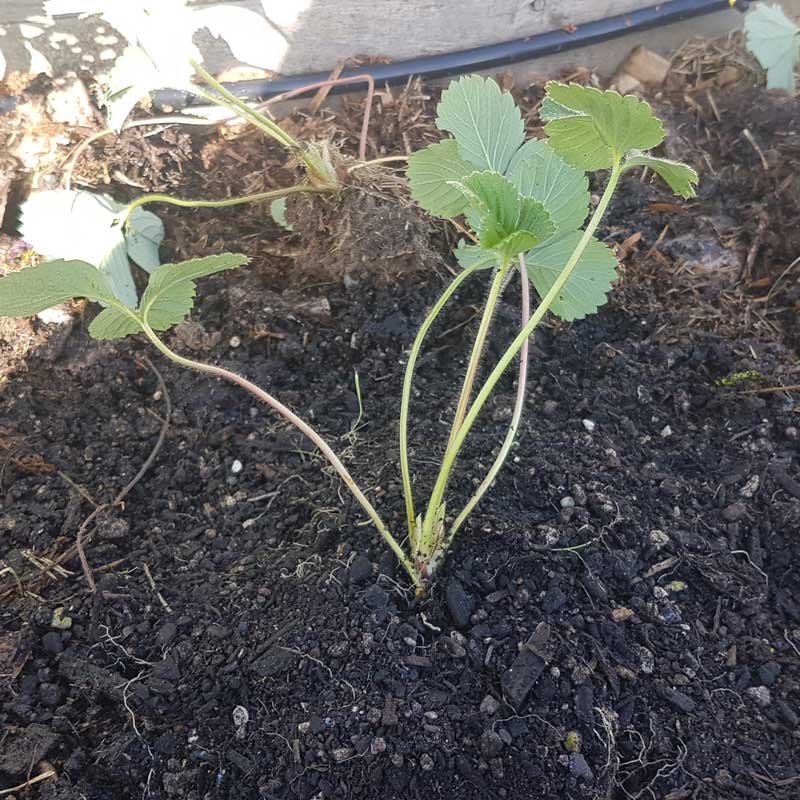
Unlike most plants, I don’t dig a hole in the soil to plant it. Instead, I place the plant on the soil’s surface and scrape the soil from around the plant onto the roots. This forms a hill which helps keep your berries protected.
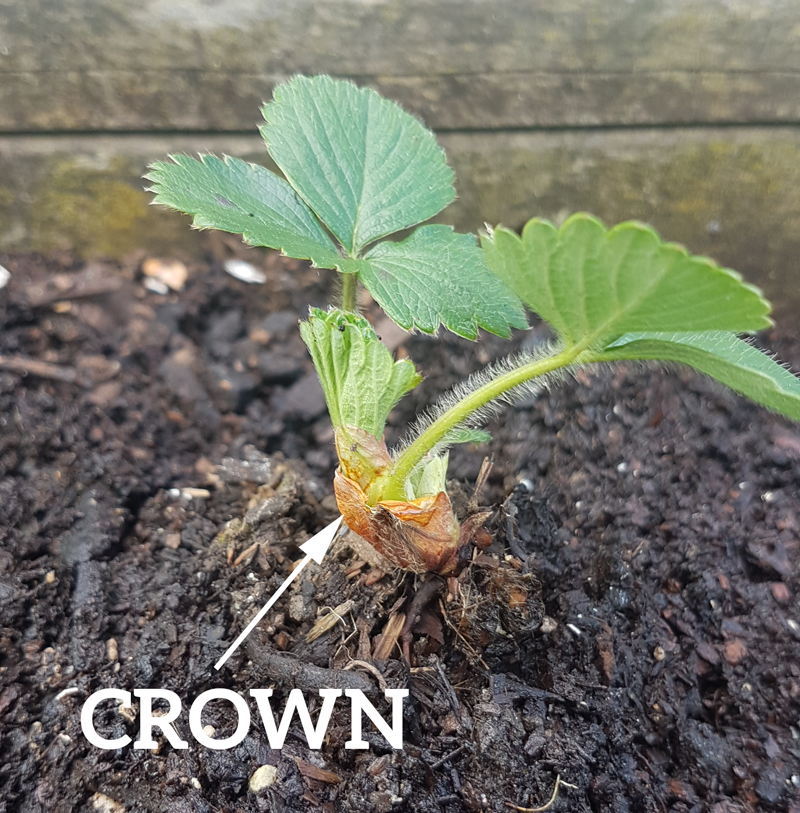
The second tip is don’t bury the crown. This is the bit the leaves (and flowers) come out of. If you bury it, you risk diseases and you’ll be making it hard to send out new flowers - thereby reducing your crop.
Next, give them space. At least 20cm, but 30cm is better. While the plants you put in your garden now are small, they’ll be huge by the end of summer.
Finally, mulch with straw or a sheet of plastic. Keeping your berries off the soil stops them from rotting before they’re ripe.
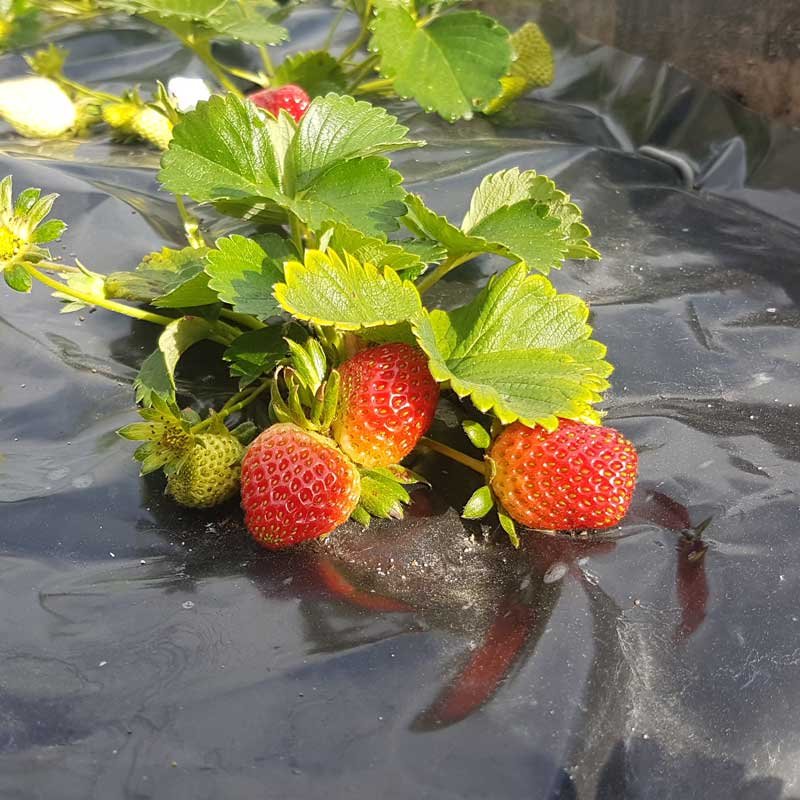

I worked with plastic once and haven't done it again. It was cheap, easy to source, and did work. The problem I had was with watering as the plastic can prevent so much water actually reaching the berries.
Personally, I think they’re called strawberries for a reason. Straw can be found in garden stores. "Strawberry straw" is usually barley straw and can be purchased in small bundles. "Pea straw" is made from... well, peas, and can be purchased in larger bags.
I've also used dried grass clippings (which work fine, but break down very fast and need replacing), and hay (would not recommend, it was full of weeds).

Common pests
The biggest pest for strawberries is birds. We found having 3 cats helped with that, but it pays to cover them with bird netting once they begin flowering.
The next biggest pest is slugs. You’ve got a few options here, though none are particularly pleasant. The easiest one is to use slug bait once the fruit begin to ripen. Use "Quash" if you're worried about children or pets eating them. I've also written about a few simple ways to sort out slugs and snails in another blog.
Finally, if hail is predicted in spring, cover your plants with a towel. We had a massive setback to our very productive crop one year when they got hit with 10 minutes of hard hail in November. All the fruit was bruised and the leaves were torn to pieces.
Berries which are starting to ripen outside can be brought inside to finish ripening. That way the bugs and birds definitely won’t get them! Just leave them on the bench, refrigeration slows the ripening process down.
Extending your harvest
The simplest way to extend your harvest throughout the year is to choose daylight neutral varieties such as San Andreas, Aromas, Temptation and Monterey. Flowering in these plants aren't triggered by daylight length, so you get berries for a longer duration.
It’s possible to get a second smaller harvest in autumn if you clip back the plants in January, and remove the runners as they appear.
The berries in the second harvest often taste a bit different, but they’re a nice treat as the cold starts to come along. To help keep them sweeter, make sure you fertilise with worm juice or a liquid seaweed fertiliser once a fortnight.
Propagation (free plants!)
Every autumn, I sell runners in packs of 10. These are baby plants sent out by the parent plants during summer and autumn.
If you allow them to grow, the runners can be dug up in late autumn and winter when they’ve got roots. Then you can give them away, sell them, or replant them to extend your own patch for next year!


READ NEXT
4 things to consider before buying fruit trees
A fruit tree is a real investment. What questions should you be thinking about to make the most of it?

READ NEXT
Citrus care guide
Do you need to prune citrus? When do you need to spray them? What fertilisers are best? Everything you need to know to get the best out of your citrus.
Related content: bird netting · birds · blood and bone · compost · freezing · fruit · garden beds · gardening · gardening advice · grow guide · harvest · mulch · organic matter · planting · plastic mulch · pots · preserving · propagation · quash · raised beds · slugs · strawberries · strawberry runners · winter gardening · worm juice
Stay in touch?
The Kat's Garden newsletter gives readers an extra peek behind the scenes. It's the best way to know when new posts go live, and what's happened since.
If you like what you've seen, join us and see what we learn next.
