
This post was originally published August 2021. Edited and re-published June 2026.
So. Your garlic is planted. You’ve seen it pop up and get off to a good start. That’s the easy bit.
Over the last decade I’ve learned a lot about pulling up a good garlic harvest. I’ve suffered rust, rot, and once when we had to booby-trap the bed to stop a wild hog digging it up.
Getting garlic through a strong growth phase is what sets it up to harvest beautiful big bulbs of garlic.
So, what can you do during the season to help it get there?
Jump to section
1. Weeding
2. Anti-fungal sprays
3. Fertilising garlic
4. Mulching garlic
5. Green garlic
6. Garlic scapes
7. When to harvest garlic
Weeding
Garlic hates competition. You can get away with a few lettuces companion-planted with the cloves. But they really need to be gone by the time the plants get big.
Humidity is what creates the ideal environment for rust. Weeds are competition that can increase the humidity. If you have weeds in your garlic patch, it's time to get out there and remove them.
A Wonder Weeder or hoe are perfect for the job (depending on how big your bed is). It's easiest to get weeds while they're small—simply dislocate the plant and it's gone.
While you're weeding, pay close attention to the leaves of your garlic and look for problems. The biggest issue you're looking for is rust. Especially if you've planted your garlic quite close together.

Anti-fungal sprays
Problems with garlic crops are usually fungal in nature. You don’t tend to find a whole lot of insect or animal pest keen on garlic. The smell puts them off.
Most of the options available to home growers are preventative. You need to reapply regularly throughout the whole season to have a hope. None of them have ever worked for me, but here’s what I’ve tried.
On the gentle end of the spectrum, try 1/4 cup apple cider vinegar per litre of water, applied weekly.
Or if you’re more invested, you can try a copper spray like Yates Liquid Copper at the rate recommended for onions once a month. For an added boost, you can add a penetrant like Yates Sprayfix.
Fertilising garlic
Garlic is hungry, and it needs nutrients to turn into whatever magic keeps the vampires away.
Particularly from about the spring equinox in September to about two weeks before harvest, it pays to feed it.
The easiest fertiliser at this stage tends to be a liquid one. Especially if they need additional water in these drier stages anyway. A general fish and/or seaweed fertiliser is a good option.
We usually have a good supply of ‘worm juice’ from the worm farm. I water it down to a concentration of about 20% and use that once every couple of weeks in the last couple of months.
It’s also worth a side dressing (a small sprinkle near the plant) of lime to make calcium available too.
Mulching garlic
Probably my least favourite job, if I'm honest. But it is also very important.
When it rains, the impact of the raindrop on bare soil can splash fungal spores up onto the plant. Mulch creates a barrier between the soil and the raindrop.
Mulch also helps keep the weeds down, and retains moisture as the garden begins to dry out.
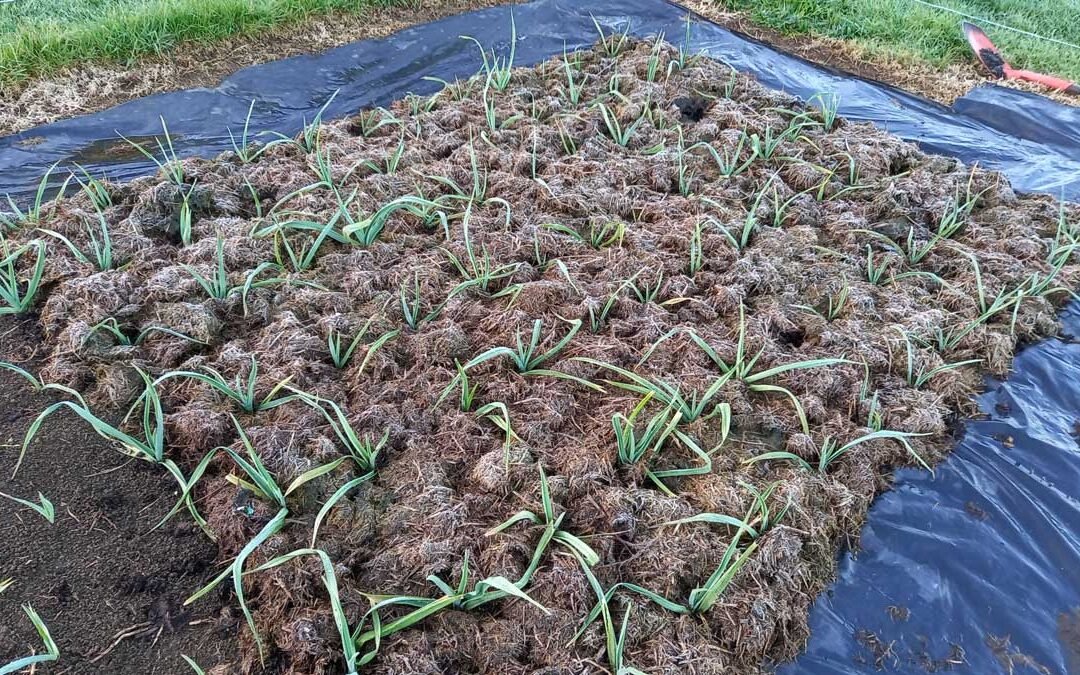
We use grass mulch. I like to apply it once it’s all popped up. Just mow it up into a catcher, and arrange it thickly (4-6cm) around the plants. Try to avoid mulch right against the garlic stem.

You could also use bark mulch, just make sure it’s well aged. Straw and hay work if you have them too.
 Kat's Garden Guide promo image. Launches 16 August 2026.")
Green garlic: my solution to rust
We are all so focused on those garlic bulbs at the end of the season that it’s possible to miss two equally-as-great joys about garlic: green garlic, and garlic scapes.
Green garlic is immature garlic. It looks like a baby leek or spring onion, but it’s garlic flavoured.
And this is my answer in 2026 to rust. When I find rust on my crops these days, I pull up infected plants, and I eat them as green garlic.
There’s honestly not much you can do to stop the spread of rust once you have it. You’ve gotta just yank that sucker up, improve air circulation, and hope the rest of them make it.
But you do get green garlic in the meantime, and that’s pretty good as a consolation prize.
Garlic scapes
If you're growing a hard-necked garlic, you'll need to keep your eye out for scapes.
Scapes are flower stalks. Sometimes they can be hard to see as they don't always stick straight up, instead curling back down towards the leaves.
The difference is garlic leaves are flat, and garlic scapes are round.

If you let your garlic scapes grow, the energy the plant would normally put into the bulb goes into growing bulbils from the flower. This is another (more effective) form of reproduction for the plant, but bulbils are not edible.
Unless you're planning a garlic breeding program, you don't want your scapes. You want to yank them out so the garlic focuses on growing fat juicy bulbs underground.

Luckily, garlic scapes are quite a popular food around the world. In New Zealand supermarkets they're sold as "garlic shoots" at about 50 cents each. You can turn them into pesto, use them in a stir fry, pickle them and so much more.
Let your scapes grow long enough to hold the stem itself. Give them a tug where they meet the leaves while twisting your hand up. They come out with a satisfying pop.
Doing it this way instead of cutting them will remove the scape properly and give you the most tender end.
Discard the flower head and get creative with your harvest. Scapes can also be frozen to use later.
When to harvest garlic
It's downhill from here. There will be less weeding, but it's still important to stay on top of weeds. Liquid-feed and monitor your crops for rust regularly.
In the final weeks of growth, pull back on any fertilisation or irrigation. This will help signal to the plant that it's time to wrap it up and fully mature for harvest.
Watch for leaves dying back from the sixth month after planting (five for some varieties like Rocamboles).
When the oldest leaves begin dying, it'll be time to gently dig around and double-check for bulb development. Once you’re happy (and before more than half the plant has died back), it’s time to pull them up and cure them.
Hopefully, that will be a blog post for another day.

READ NEXT
Everything I know about planting garlic
Growing successful garlic depends on your garden's climate. Lessons from a decade's experience in a warm climate.
READ NEXT
The dreaded garlic rust
When my crops got hit with rust, I went down a rabbit hole to discover everything I can to prevent its spread (it didn't work).
Related content: compost · copper · Far North · fertiliser · gardening advice · garlic · garlic rust · garlic scapes · green garlic · grow guide · mulch · sprayfix · spraying · The Outpost · weeding · wonder weeder · worm farm · worm juice
Stay in touch?
The Kat's Garden newsletter gives readers an extra peek behind the scenes. It's the best way to know when new posts go live, and what's happened since.
If you like what you've seen, join us and see what we learn next.
